Security Testing
Tomaso Vasella


You don’t have to be an ICT security professional these days to know that your Internet access device at home has not the best security reputation. Just look for home router vulnerabilities in your favorite search engine and you’ll discover plenty of information:
The list goes on. I don’t see things getting better in the future. Your Internet provider (cable, xDSL, EDGE/G3/LTE) wants to provide network access and functionality (WLAN, IP-VOICE) all packed in a small device (which is more often than not free) at a competitive price to as many customers as possible. Now think about your small box you have at home: do you think there is room for security? I mean real security. Well, make an educated guess. If you care about your digital properties at home, you should start securing your fences right after your provider gives you router access. Setting an open-source firewall on an old PC would do the trick, but the majority of us have to deal with installation in the living room near the TV or in rooms were we cannot afford to have big and noisy devices. And don’t forget the power consumption.
Let’s start a small project on building our personal firewall appliance. To make it work our security design has to fullfil following requirements:
It’s just like the Internet provider’s device but with one difference: the device will cost a bit more. Security will always have a higher cost on our budget but for this project we’ll set a limit of 200 $/CHF.
Let’s implement following simple network design:

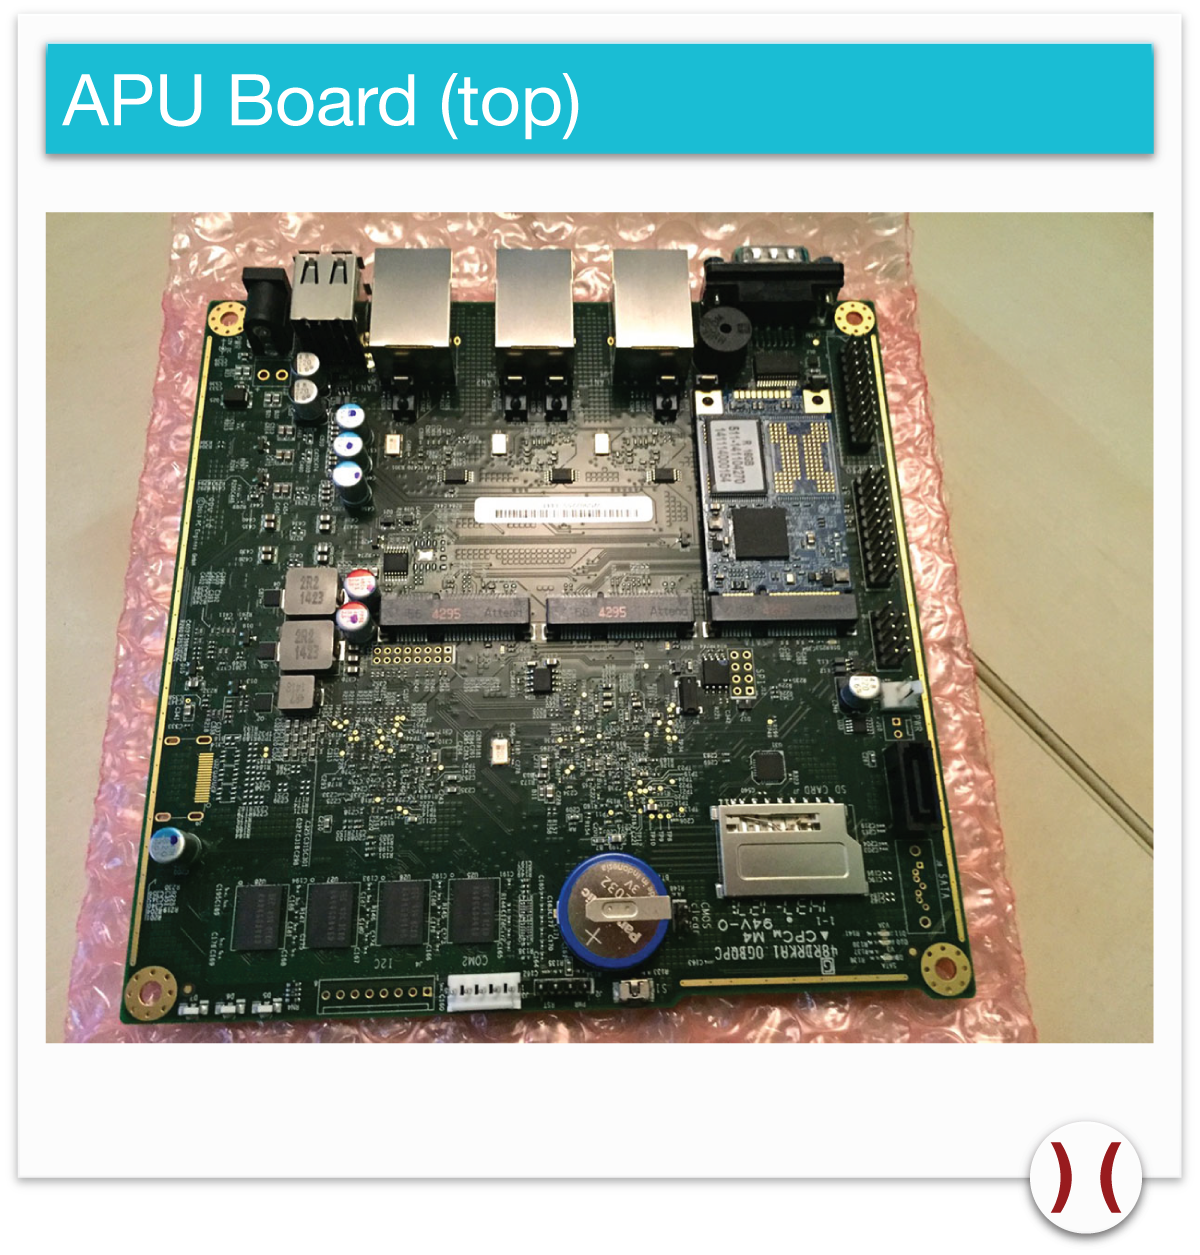
I’ve found a custom made appliance that fulfills all requirements and it’s made by a nice and small Swiss company called PC Engines. They have several models that fits for a number of use cases and in our case we’ll take the so called APU for this firewall project. The APU appliance has the size of a small chocolate box and fits almost everywhere and here are the technical specs:
More detailed documentation is available here
Those specs are rather amazing. We could use the same hardware for a number of other interesting projects like home automation, NMS, Network Analysis and much more. This time we’ll create a Firewall that has all features for our home security but it could easily secure small to medium business. Here are the needed components:
| Component | Reference | CHF | USD |
|---|---|---|---|
| Board | PCEngines apu1d4 | 150.00 | 150.00 |
| Storage | PCEngines msata16d SSD Module | 20.00 | 20.00 |
| Power supply | PCEngines ac12veur2 AC adapter with euro plug | 5.00 | 5.00 |
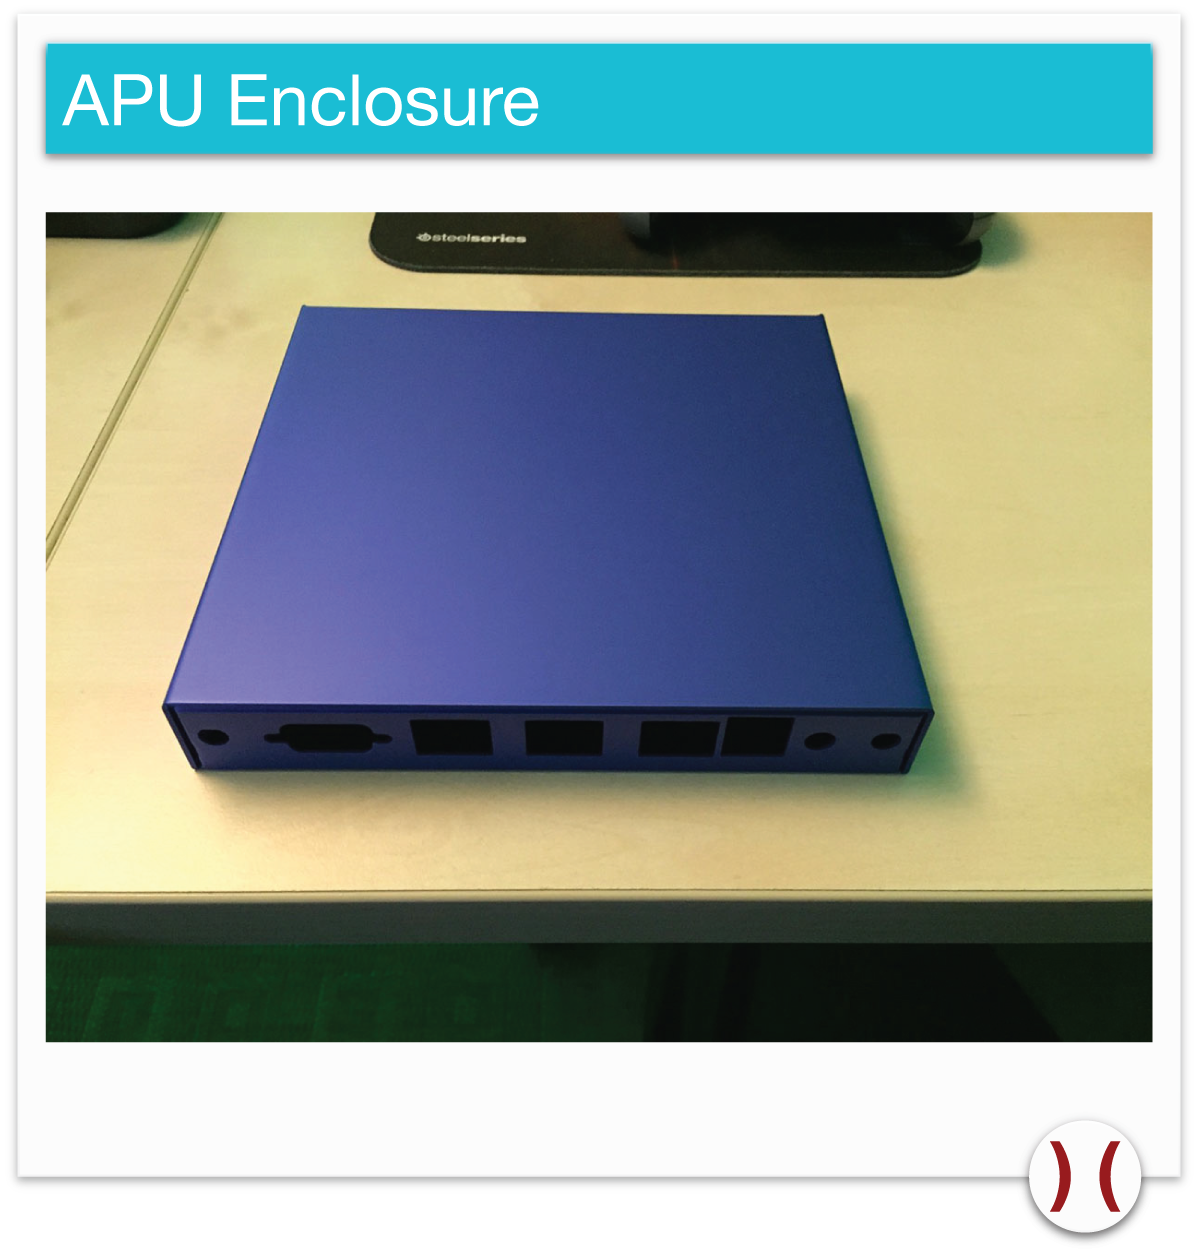
| Enclosure | PCEngines case1d2bluu Enclosure 3 LAN USB blue | 10.00 | 10.00 |

| Component | Reference | CHF | USD |
|---|---|---|---|
| Null Modem Cable | PCEngines db9cab1 Null Modem Cable | 2.00 | 2.00 |
| Component | Reference | CHF | USD |
|---|---|---|---|
| Board | PCEngines apu1d System Board | 125.00 | 127.00 |
The hardware appliance is just like a normal x64 PC without video card, so you could install various operating systems on it like Linux, FreeBSD, OpenBSD but they need to redirect the console output to the serial port.
I recommend a FreeBSD-based open-source firewall distribution called OPNsense. Feel free to find out more about the distribution’s features and architecture on their website. Here are my personal views on why OPNsense is the way to go:
Once we get the Hardware, we need to assemble it. I highly recommend following the guides on PCEngine’s website

For the setup process we need following:
The following steps were done on Linux. Feel free to use your preferred environment:
wget http://sourceforge.net/projects/opnsense/files/15.1.7/OPNsense-15.1.7-serial-amd64.img.bz2
wget http://sourceforge.net/projects/opnsense/files/15.1.7/OPNsense-15.1.7-checksums-amd64.sha256
root@blacknovo:~/Downloads# cat OPNsense-15.1.7-checksums-amd64.sha256
SHA256 (OPNsense-15.1.7-cdrom-amd64.iso.bz2) = e46bb9acd010977d24d862bbe0a85ebfbdcc42dd633851056ad52402bec4b119
SHA256 (OPNsense-15.1.7-serial-amd64.img.bz2) = 869e985fc21d083e2530a81e96eb274caf753b4b9db33d04bda86d4e427a240a
SHA256 (OPNsense-15.1.7-vga-amd64.img.bz2) = b9c71b431cf2ffa399da6a7b11f50d971f7c1747512e794bb7e930dde6d5daeb

root@blacknovo:~/Downloads# sha256sum OPNsense-15.1.7-serial-amd64.img.bz2
869e985fc21d083e2530a81e96eb274caf753b4b9db33d04bda86d4e427a240a  OPNsense-15.1.7-serial-amd64.img.bz2
root@blacknovo:~/Downloads# bunzip2 OPNsense-15.1.7-serial-amd64.img.bz2
dmesg:... [1777015.998438] sd 6:0:0:0: [sdb] 1984000 512-byte logical blocks: (1.01 GB/968 MiB) [1777016.007803] sdb: sdb1 [1777016.425180] FAT-fs (sdb1): utf8 is not a recommended IO charset for FAT filesystems, filesystem will be case sensitive! [1777016.429920] FAT-fs (sdb1): Volume was not properly unmounted. Some data may be corrupt. Please run fsck. ...
fdisk -lDisk /dev/sdb: 1015 MB, 1015808000 bytes 255 heads, 63 sectors/track, 123 cylinders, total 1984000 sectors Units = sectors of 1 * 512 = 512 bytes Sector size (logical/physical): 512 bytes / 512 bytes I/O size (minimum/optimal): 512 bytes / 512 bytes Disk identifier: 0x00000000 Device Boot Start End Blocks Id System /dev/sdb1 * 2 1983999 991999 b W95 FAT32
root@blacknovo:~/Downloads#  dd if=./OPNsense-15.1.7-serial-amd64.img of=/dev/sdb bs=16K
39069+0 records in
39069+0 records out
640106496 bytes (640 MB) copied, 86.1828 s, 7.4 MB/s
fdisk -l:Disk /dev/sdb: 1015 MB, 1015808000 bytes 255 heads, 63 sectors/track, 123 cylinders, total 1984000 sectors Units = sectors of 1 * 512 = 512 bytes Sector size (logical/physical): 512 bytes / 512 bytes I/O size (minimum/optimal): 512 bytes / 512 bytes Disk identifier: 0x90909090 Device Boot Start End Blocks Id System /dev/sdb4 * 0 49999 25000 a5 FreeBSD
When configuring the terminal console environment you need a PC/Laptop with a serial port or a USB to Serial adapter. Use your preferred terminal console program and set it to 115200,8,N,1 meaning: 115200 baud, 8 bit, parity None, stop-bit 1. I use minicom in a privileged Linux terminal session. Here are the configuration steps:
minicom -s to enter setup modeee for 115200 baud, leave the rest as default +-----------------+---------[Comm Parameters]----------+----------------+
| A - Serial De| | |
| B - Lockfile Loc| Current: 115200 8N1 | |
| C - Callin Pro| Speed Parity Data | |
| D - Callout Pro| A: <next> L: None S: 5 | |
| E - Bps/Par/B| B: <prev> M: Even T: 6 | |
| F - Hardware Flo| C: 9600 N: Odd U: 7 | |
| G - Software Flo| D: 38400 O: Mark V: 8 | |
| | E: 115200 P: Space | |
| Change which | | |
+-----------------| Stopbits |----------------+
| Screen a| W: 1 Q: 8-N-1 |
| Save set| X: 2 R: 7-E-1 |
| Save set| |
| Exit | |
| Exit fro| Choice, or <Enter> to exit? |
+---------+------------------------------------+a/dev/ttyUSB0 or /dev/ttyUSB1 (check with dmesg if unsure) otherwise you should select the serial device (probably /dev/ttyS0 or /dev/ttyS1) +-----------------------------------------------------------------------+
| A - Serial Device : /dev/ttyUSB0 |
| B - Lockfile Location : /var/lock |
| C - Callin Program : |
| D - Callout Program : |
| E - Bps/Par/Bits : 115200 8N1 |
| F - Hardware Flow Control : Yes |
| G - Software Flow Control : No |
| |
| Change which setting? |
+-----------------------------------------------------------------------+On the bottom line of the terminal windows you should see this line:
[CTRL-A Z for help |115200 8N1 | NOR | Minicom 2.6.1 | VT102 | Offline ]
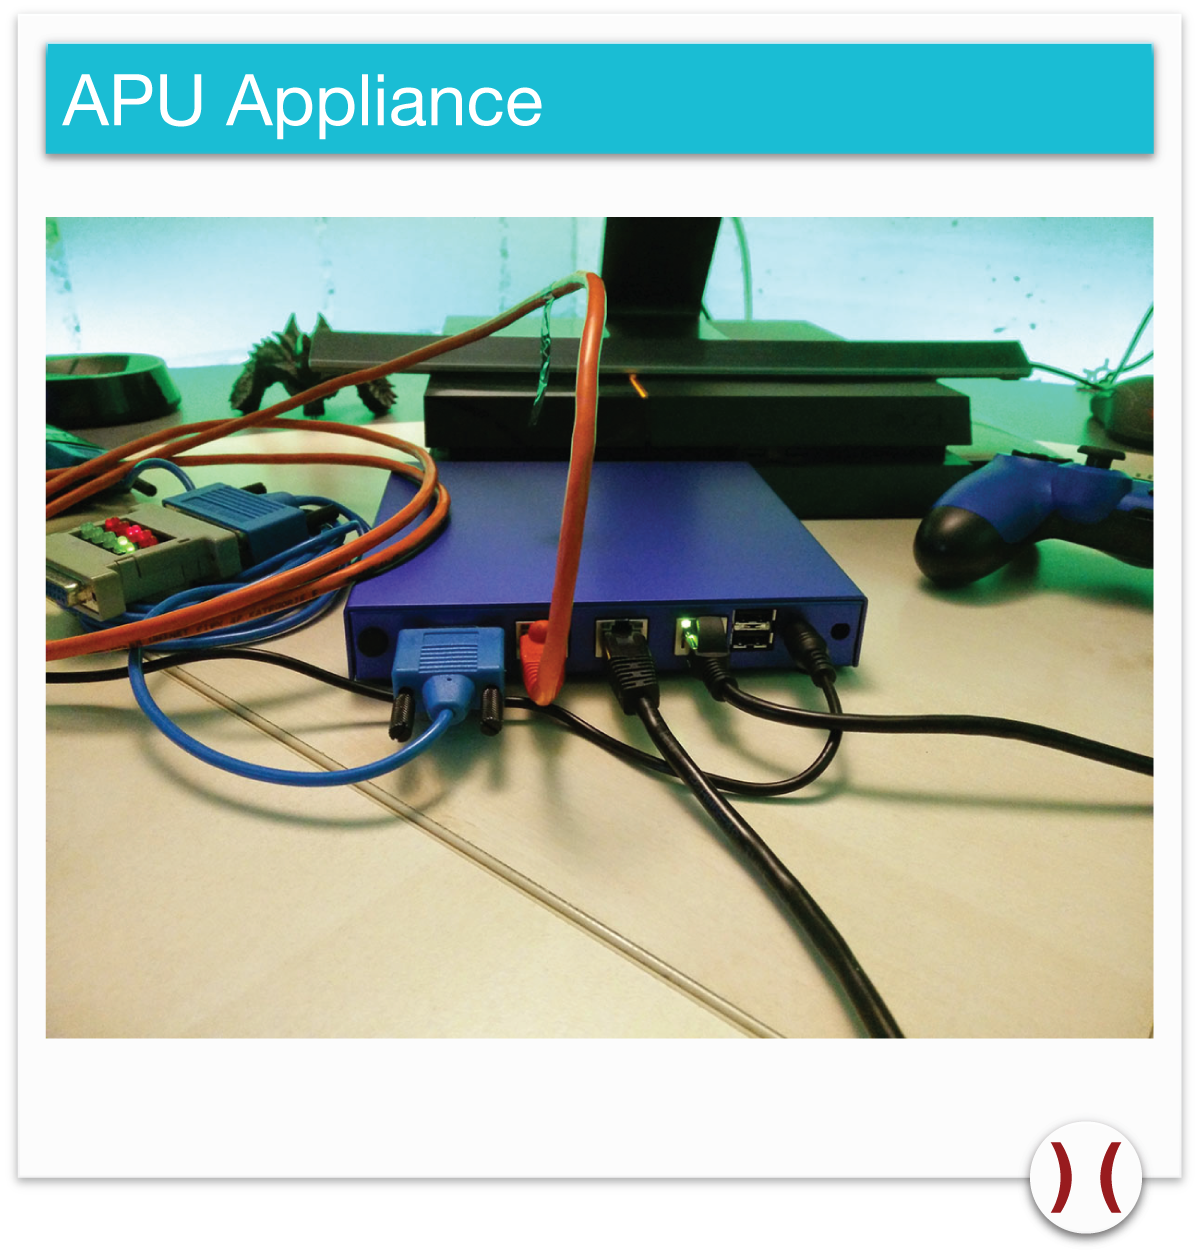
Now power-on the APU board using this procedure:
You should see the BIOS POST messages on your terminal console:
PC Engines APU BIOS build date: Apr  5 2014
Reading data from file [bootorder]
SeaBIOS (version ?-20140405_120742-frink)
SeaBIOS (version ?-20140405_120742-frink)
Found coreboot cbmem console @ df150400
Found mainboard PC Engines APU
Relocating init from 0x000e8e71 to 0xdf1065e0 (size 39259)
Found CBFS header at 0xfffffb90
found file "bootorder" in cbmem
CPU Mhz=1001
Found 27 PCI devices (max PCI bus is 05)
Copying PIR from 0xdf160400 to 0x000f27a0
Copying MPTABLE from 0xdf161400/df161410 to 0x000f25b0 with length 1ec
Copying ACPI RSDP from 0xdf162400 to 0x000f2590
Copying SMBIOS entry point from 0xdf16d800 to 0x000f2570
Using pmtimer, ioport 0x808
Scan for VGA option rom
EHCI init on dev 00:12.2 (regs=0xf7f08420)
Found 1 lpt ports
Found 2 serial ports
AHCI controller at 11.0, iobase f7f08000, irq 11
EHCI init on dev 00:13.2 (regs=0xf7f08520)
EHCI init on dev 00:16.2 (regs=0xf7f08620)
Searching bootorder for: /pci@i0cf8/*@11/drive@0/disk@0
AHCI/0: registering: "AHCI/0: SATA SSD ATA-10 Hard-Disk (15272 MiBytes)"
Searching bootorder for: /rom@img/setup
Searching bootorder for: /rom@img/memtest
OHCI init on dev 00:12.0 (regs=0xf7f04000)
OHCI init on dev 00:13.0 (regs=0xf7f05000)
OHCI init on dev 00:14.5 (regs=0xf7f06000)
OHCI init on dev 00:16.0 (regs=0xf7f07000)
Searching bootorder for: /pci@i0cf8/usb@16,2/storage@1/*@0/*@0,0
Searching bootorder for: /pci@i0cf8/usb@16,2/usb-*@1
USB MSC vendor='Multiple' product='Card  Reader' rev='1.00' type=0 removable=1
USB MSC blksize=512 sectors=1984000
All threads complete.
Scan for option roms
Running option rom at c000:0003

iPXE (http://ipxe.org) 00:00.0 C000 PCI2.10 PnP PMMpmm call arg1=1
pmm call arg1=0
+DF0E94B0pmm call arg1=1
pmm call arg1=0
+DF0494B0 C000

Searching bootorder for: /rom@genroms/pxeboot.rom

Build date: Apr  5 2014
System memory size: 4592 MB

Press F12 for boot menu.
  ______               ____   _____ _____
 |  ____|             |  _ \ / ____|  __ \
 | |___ _ __ ___  ___ | |_) | (___ | |  | |
 |  ___| '__/ _ \/ _ \|  _ < \___ \| |  | |
 | |   | | |  __/  __/| |_) |____) | |__| |
 | |   | | |    |    ||     |      |      |
 |_|   |_|  \___|\___||____/|_____/|_____/    ```                        `
                                             s` `.....---.......--.```   -/
 +------------Welcome to FreeBSD-----------+ +o   .--`         /y:`      +.
 |                                         |  yo`:.            :o      `+-
 |  1. Boot Multi User [Enter]             |   y/               -/`   -o/
 |  2. Boot [S]ingle User                  |  .-                  ::/sy+:.
 |  3. [Esc]ape to loader prompt           |  /                     `--  /
 |  4. Reboot                              | `:                          :`
 |                                         | `:                          :`
 |  Options:                               |  /                          /
 |  5. [K]ernel: kernel (1 of 2)           |  .-                        -.
 |  6. Configure Boot [O]ptions...         |   --                      -.
 |                                         |    `:`                  `:`
 |                                         |      .--             `--.
 |                                         |         .---.....----.
+-----------------------------------------+/boot/kernel/kernel text=0x11ae738 data=0x6d65b0+0x215440 syms=[0x8+0x1720b0+0x
Booting...
KDB: debugger backends: ddb
KDB: current backend: ddb
Copyright (c) 1992-2014 The FreeBSD Project.
Copyright (c) 1979, 1980, 1983, 1986, 1988, 1989, 1991, 1992, 1993, 1994
The Regents of the University of California. All rights reserved.
FreeBSD is a registered trademark of The FreeBSD Foundation.
FreeBSD 10.1-RELEASE-p6 #0 5aa5ada(master): Thu Feb 26 16:26:03 CET 2015
root@sensey64:/usr/obj/usr/src/sys/SMP amd64
FreeBSD clang version 3.4.1 (tags/RELEASE_34/dot1-final 208032) 20140512
....Waiting for backend...
=========== Configure Console ===========
| |
| Your selected environment uses the |
| following console settings, shown in |
| parentheses. Select any that you wish |
| to change. |
| |
| < Accept these Settings > |
| < Change Video Font (default) > |
| < Change Screenmap (default) > |
| < Change Keymap (default) > |
========================================= < Quick/Easy Install >
============== Are you SURE? ==============
| |
| Easy Install will automatically install |
| without asking any questions. |
| |
| WARNING: This will erase all contents |
| in your first hard disk! This action is |
| irreversible. Do you really want to |
| continue? |
| |
| If you wish to have more control on |
| your setup, choose Custom Installation |
| from the Main Menu. |
| |
| < OK > < Cancel > |
=========================================== ================= Reboot ================
| |
| This machine is about to be shut down.|
| After the machine has reached its |
| shutdown state, you may remove the CD |
| from the CD-ROM drive tray and press |
| Enter to reboot from the HDD. |
| |
| < Reboot > < Return to Select Task > |
=========================================reboot and remove the installation mediaAfter the reboot is complete, open a web browser and enter https://192.168.1.1 (or the LAN IP Address) in the location bar. You might need to acknowledge the HTTPS certificate if your browser reports it as untrusted. This is normal as a self-signed certificate is used by default. *DEFAULT Username*: root *DEFAULT Password*: opnsense Rebooting in 5 seconds. CTRL-C to abort.
F1  FreeBSD

F6 PXE
Boot:  F1

...
...
...

Loading configuration...done.

Default interfaces not found -- Running interface assignment option.

Valid interfaces are:

re0    00:0d:b9:37:12:bc   (up) RealTek 8168/8111 B/C/CP/D/DP/E/F/G PCIe Gigabit Ethernet
re1    00:0d:b9:37:12:bd   (up) RealTek 8168/8111 B/C/CP/D/DP/E/F/G PCIe Gigabit Ethernet
re2    00:0d:b9:37:12:be   (up) RealTek 8168/8111 B/C/CP/D/DP/E/F/G PCIe Gigabit Ethernet

Do you want to set up VLANs first?

If you are not going to use VLANs, or only for optional interfaces, you should
say no here and use the webConfigurator to configure VLANs later, if required.

Do you want to set up VLANs now [y|n]?
n for no VLAN configuration (unless you have to) and continue(type) re2 as your WAN interface, this would be the one near the USB hub.If you do not know the names of your interfaces, you may choose to use auto-detection. In that case, disconnect all interfaces now before hitting @a@ to initiate auto detection. Enter the WAN interface name or @a@ for auto-detection: re2
(type) re0 as your LAN interface (near the serial console port)Enter the LAN interface name or 'a' for auto-detection NOTE: this enables full Firewalling/NAT mode. (or nothing if finished): re0
(type) re1 as your OPT1 interface, to use for your WLAN APEnter the Optional 1 interface name or 'a' for auto-detection (or nothing if finished): re1
Enter the Optional 2 interface name or 'a' for auto-detection
(or nothing if finished):

The interfaces will be assigned as follows:

WAN  -> re2
LAN  -> re0
OPT1 -> re1
y to proceedDo you want to proceed [y|n]? y Writing configuration...done. Updating configuration...done. Cleaning backup cache...done. Setting up extended sysctls...done. Setting timezone...done. Configuring loopback interface...done. Starting syslog...done. Starting Secure Shell Services...done. Setting up polling defaults...done. Setting up interfaces microcode...done. Configuring loopback interface...done. Creating wireless clone interfaces...done. Configuring LAGG interfaces...done. Configuring VLAN interfaces...done. Configuring QinQ interfaces...done. Configuring WAN interface...done. Configuring LAN interface...done. Syncing OpenVPN settings...done. Configuring firewall......done. Starting PFLOG...done. Setting up gateway monitors...done. Synchronizing user settings...done. Starting webConfigurator...done. Configuring CRON...done. Starting DNS forwarder...done. Starting NTP time client...done. Starting DHCP service...done. Starting DHCPv6 service...done. Configuring firewall......done. Generating RRD graphs...done. Starting syslog...done. Starting CRON... done. *** Welcome to OPNsense 15.1.7-78bdb9aef (amd64) on OPNsense *** WAN (re2) -> v4/DHCP4: 192.168.169.155/24 LAN (re0) -> v4: 192.168.1.1/24 OPT1 (re1) -> FreeBSD/amd64 (OPNsense.localdomain) (ttyu0) login:
root/opnsenselogin: root Password: FreeBSD 10.1-RELEASE-p6 (SMP) #0 5aa5ada(master): Thu Feb 26 16:26:03 CET 2015 Welcome to FreeBSD! Release Notes, Errata: https://www.FreeBSD.org/releases/ Security Advisories: https://www.FreeBSD.org/security/ FreeBSD Handbook: https://www.FreeBSD.org/handbook/ FreeBSD FAQ: https://www.FreeBSD.org/faq/ Questions List: https://lists.FreeBSD.org/mailman/listinfo/freebsd-questions/ FreeBSD Forums: https://forums.FreeBSD.org/ Documents installed with the system are in the /usr/local/share/doc/freebsd/ directory, or can be installed later with: pkg install en-freebsd-doc For other languages, replace "en" with a language code like de or fr. Show the version of FreeBSD installed: freebsd-version ; uname -a Please include that output and any error messages when posting questions. Introduction to manual pages: man man FreeBSD directory layout: man hier Edit /etc/motd to change this login announcement. 0) Logout 7) Ping host 1) Assign Interfaces 8) Shell 2) Set interface(s) IP address 9) pfTop 3) Reset the root password 10) Filter Logs 4) Reset to factory defaults 11) Restart web interface 5) Reboot system 12) Upgrade from console 6) Halt system 13) Restore a configuration Enter an option:
2 and enterAvailable interfaces: 1 - WAN (re2 - dhcp, dhcp6) 2 - LAN (re0 - static) 3 - OPT1 (re1 - static) Enter the number of the interface you wish to configure:
3 and enter the rest is self explanatory just look the protocol below:Enter the new OPT1 IPv4 address. Press <ENTER> for none:
> 192.168.168.254
Subnet masks are entered as bit counts (as in CIDR notation) in OPNsense.
e.g. 255.255.255.0 = 24
255.255.0.0 = 16
255.0.0.0 = 8
Enter the new OPT1 IPv4 subnet bit count (1 to 31):
> 24
For a WAN, enter the new OPT1 IPv4 upstream gateway address.
For a LAN, press <ENTER> for none:
>
Enter the new OPT1 IPv6 address. Press <ENTER> for none:
>
Do you want to enable the DHCP server on OPT1? (y/n) n
Do you want to revert to HTTP as the webConfigurator protocol? (y/n) n
Please wait while the changes are saved to OPT1...
Reloading filter...
DHCPD...
The IPv4 OPT1 address has been set to 192.168.168.254/24
Press <ENTER> to continue.
Reboot the appliance5 and enter – confirm with yOPNsense will reboot. This may take a minute, depending on your hardware. Do you want to proceed [y|n]? y OPNsense is rebooting now. *** FINAL System shutdown message from root@OPNsense.localdomain *** System going down IMMEDIATELY
We’re finally done with the APU appliance installation.
Wait for the appliance to be up again and access the Webadmin GUI on https://192.168.1.1
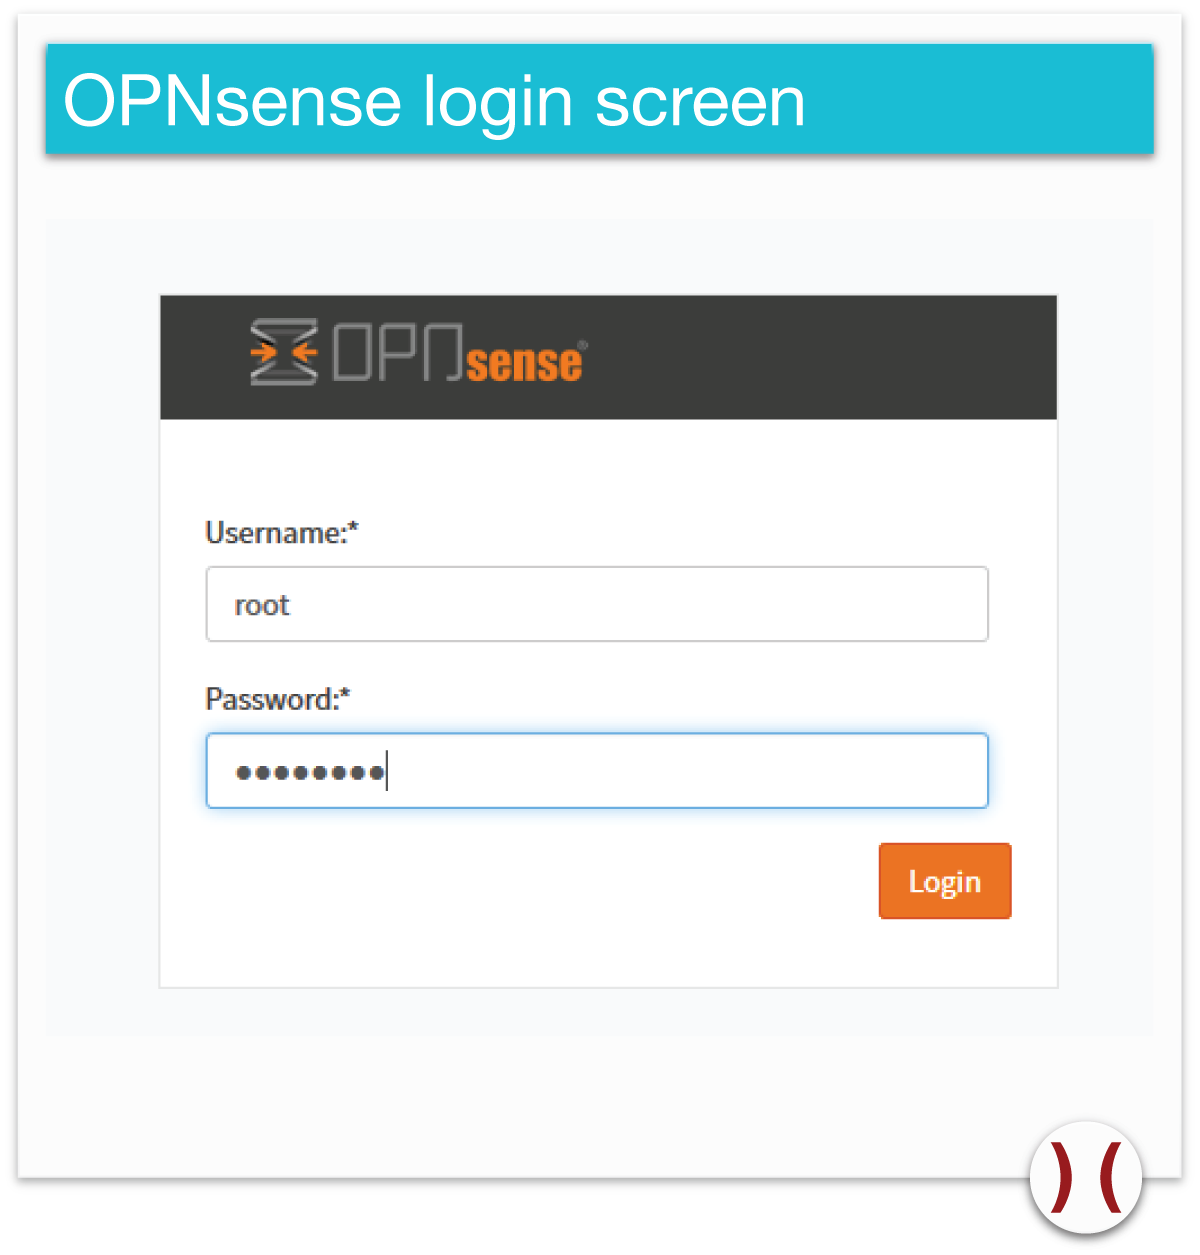
Enter the default credential to enter the admin console.
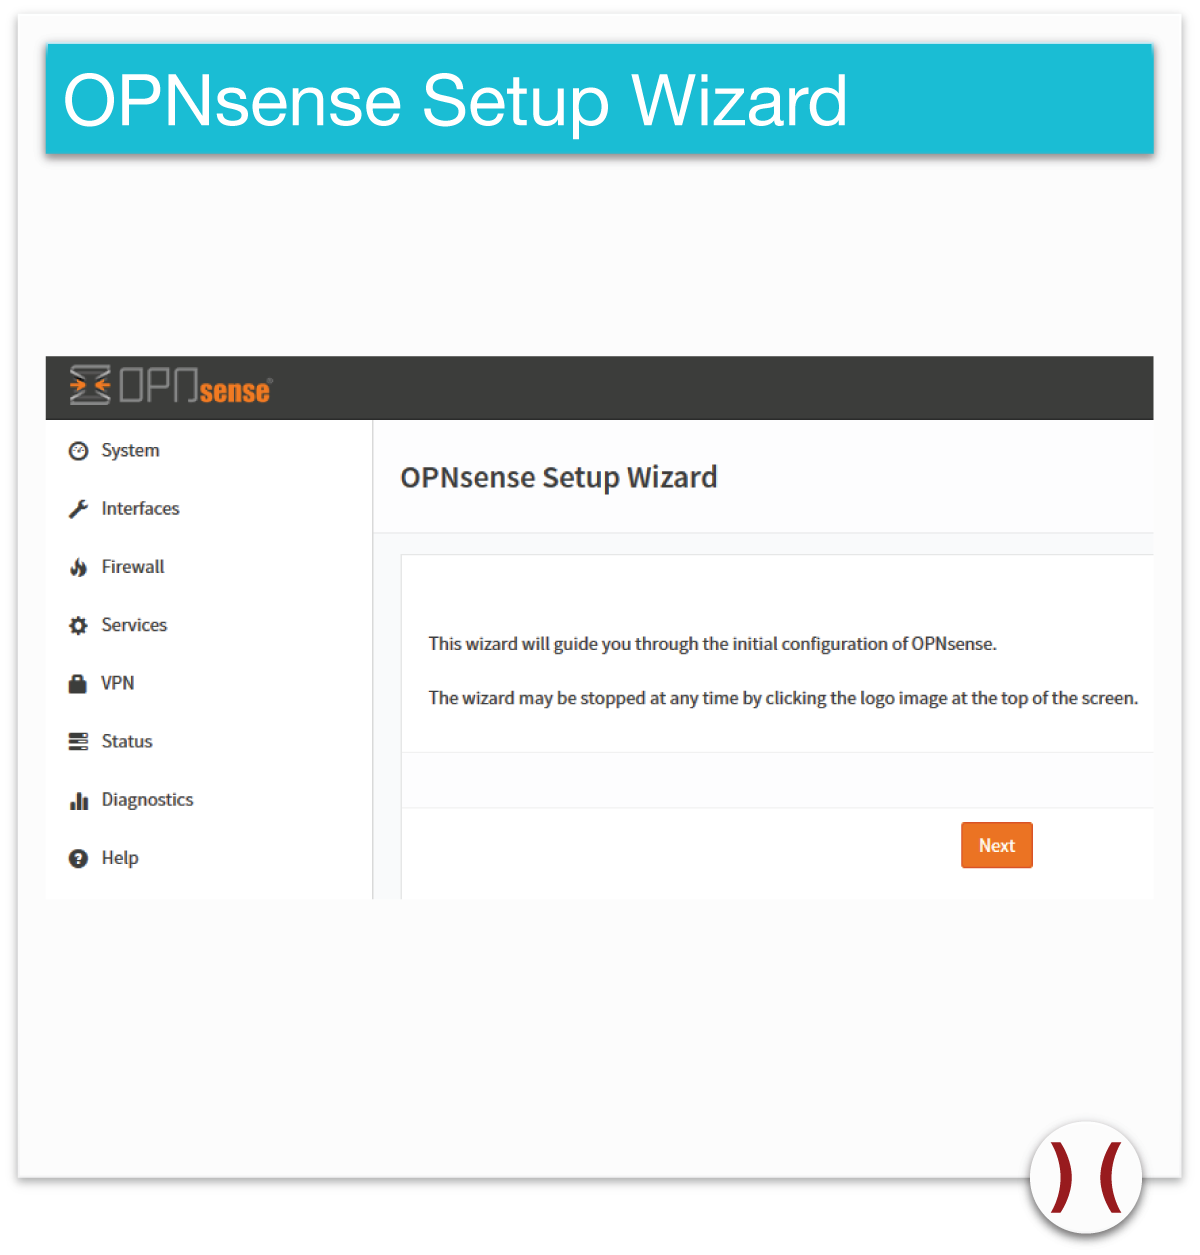
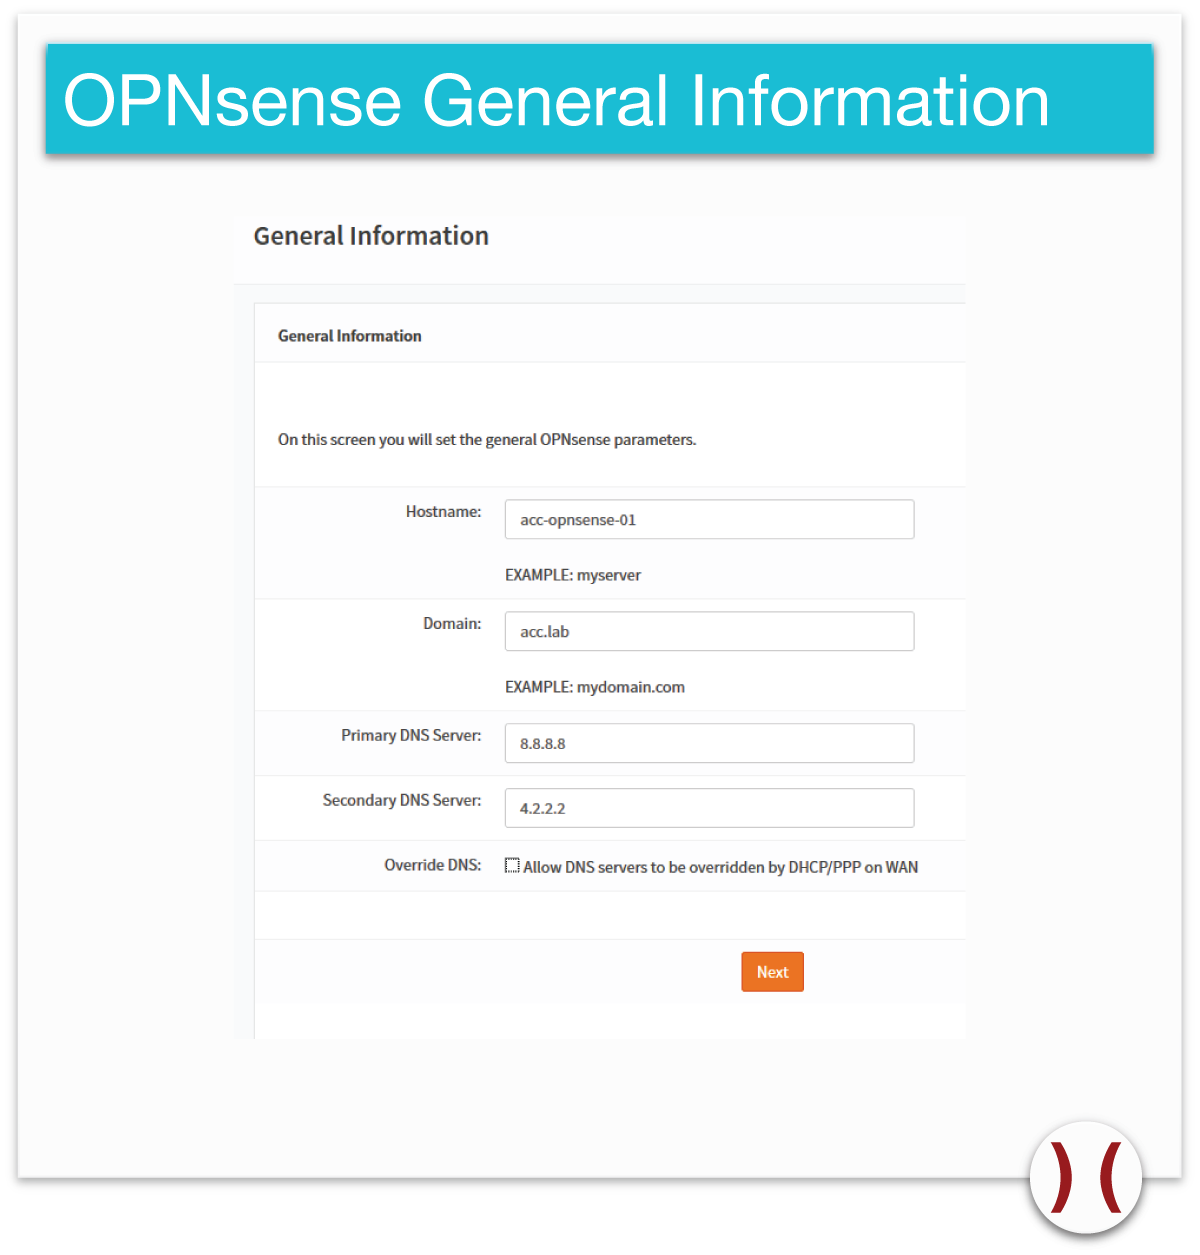
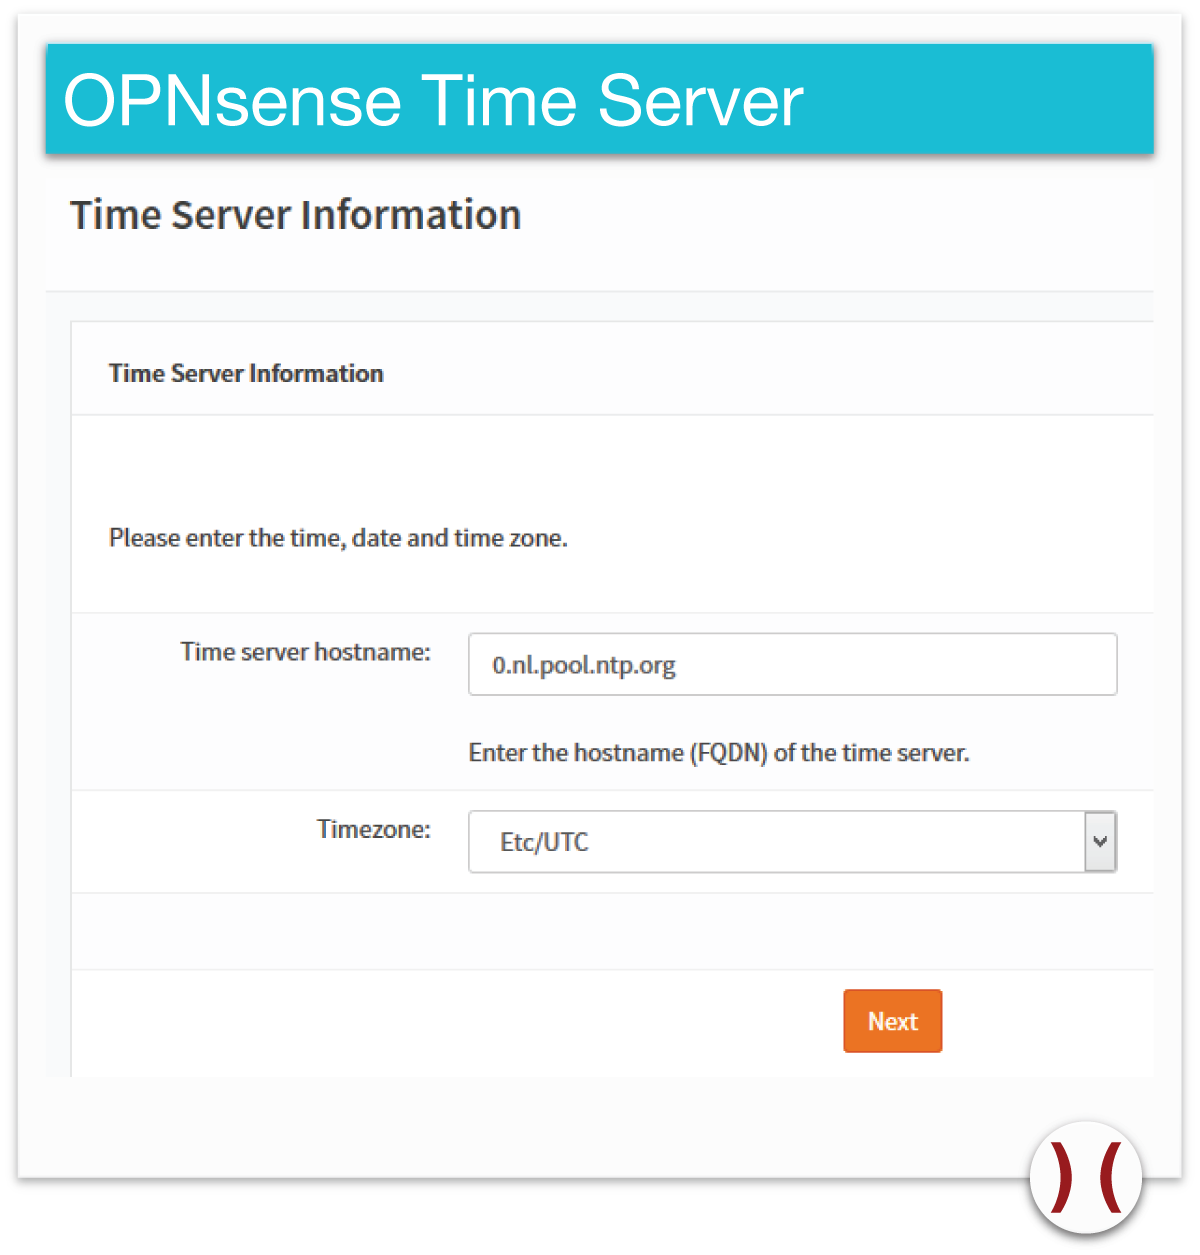
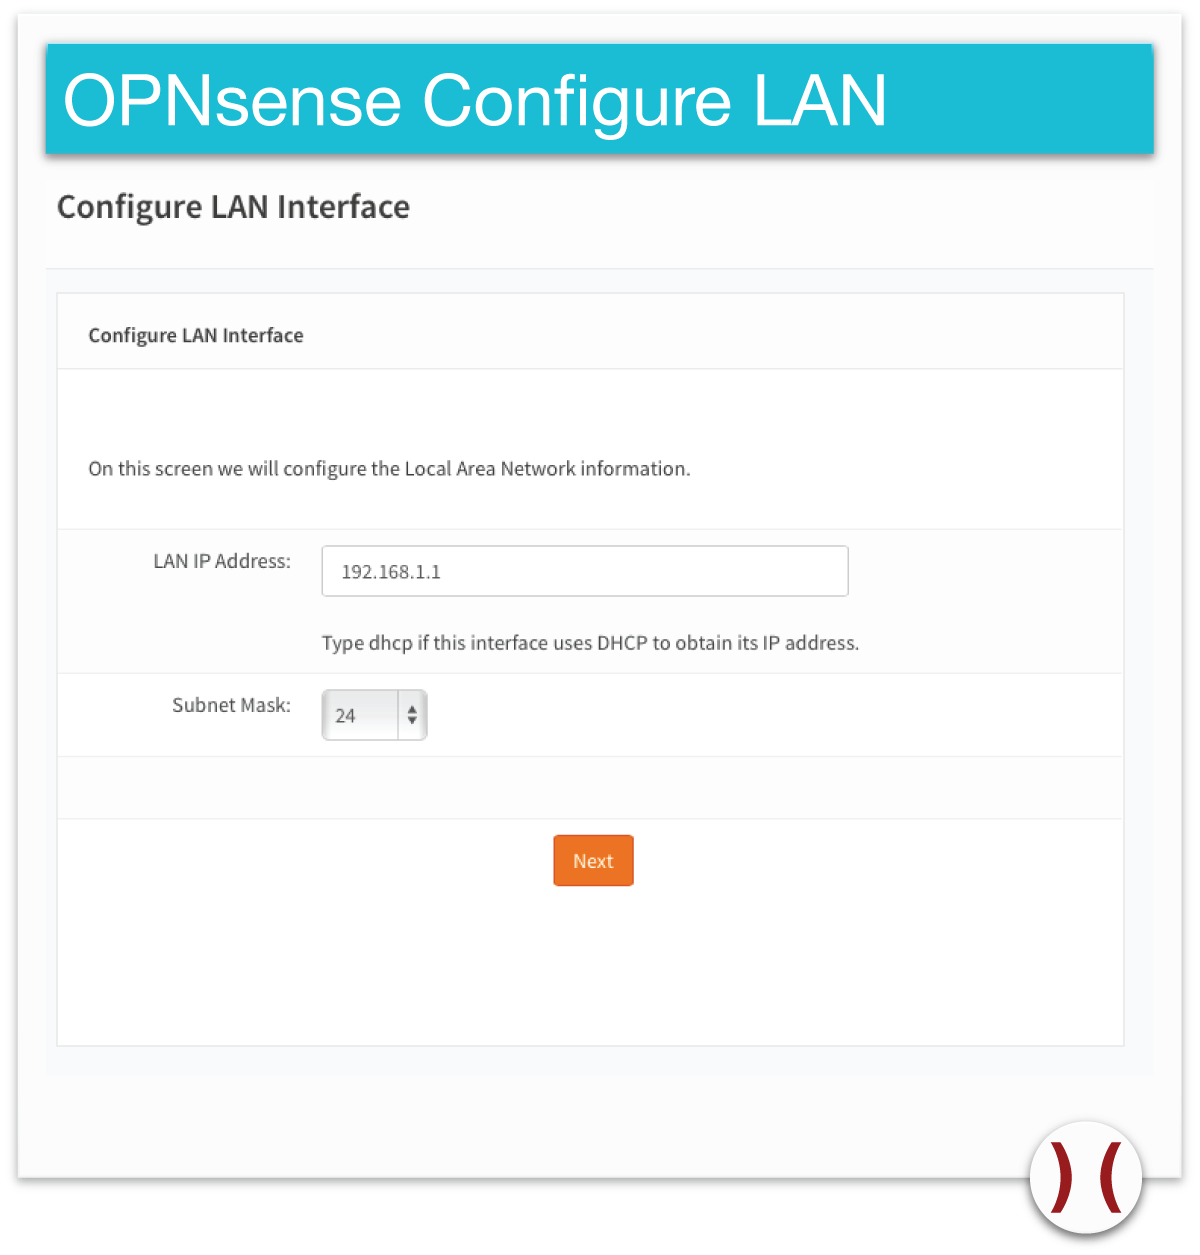
Without configuration your appliance will provide DHCP leases on LAN, respond on DNS requests and allow outgoing IP communication from LAN to WAN on all IP protocols. That’s why at first login you’ll be presented with the OPNsense Setup Wizard. Just go ahead and follow the wizard…
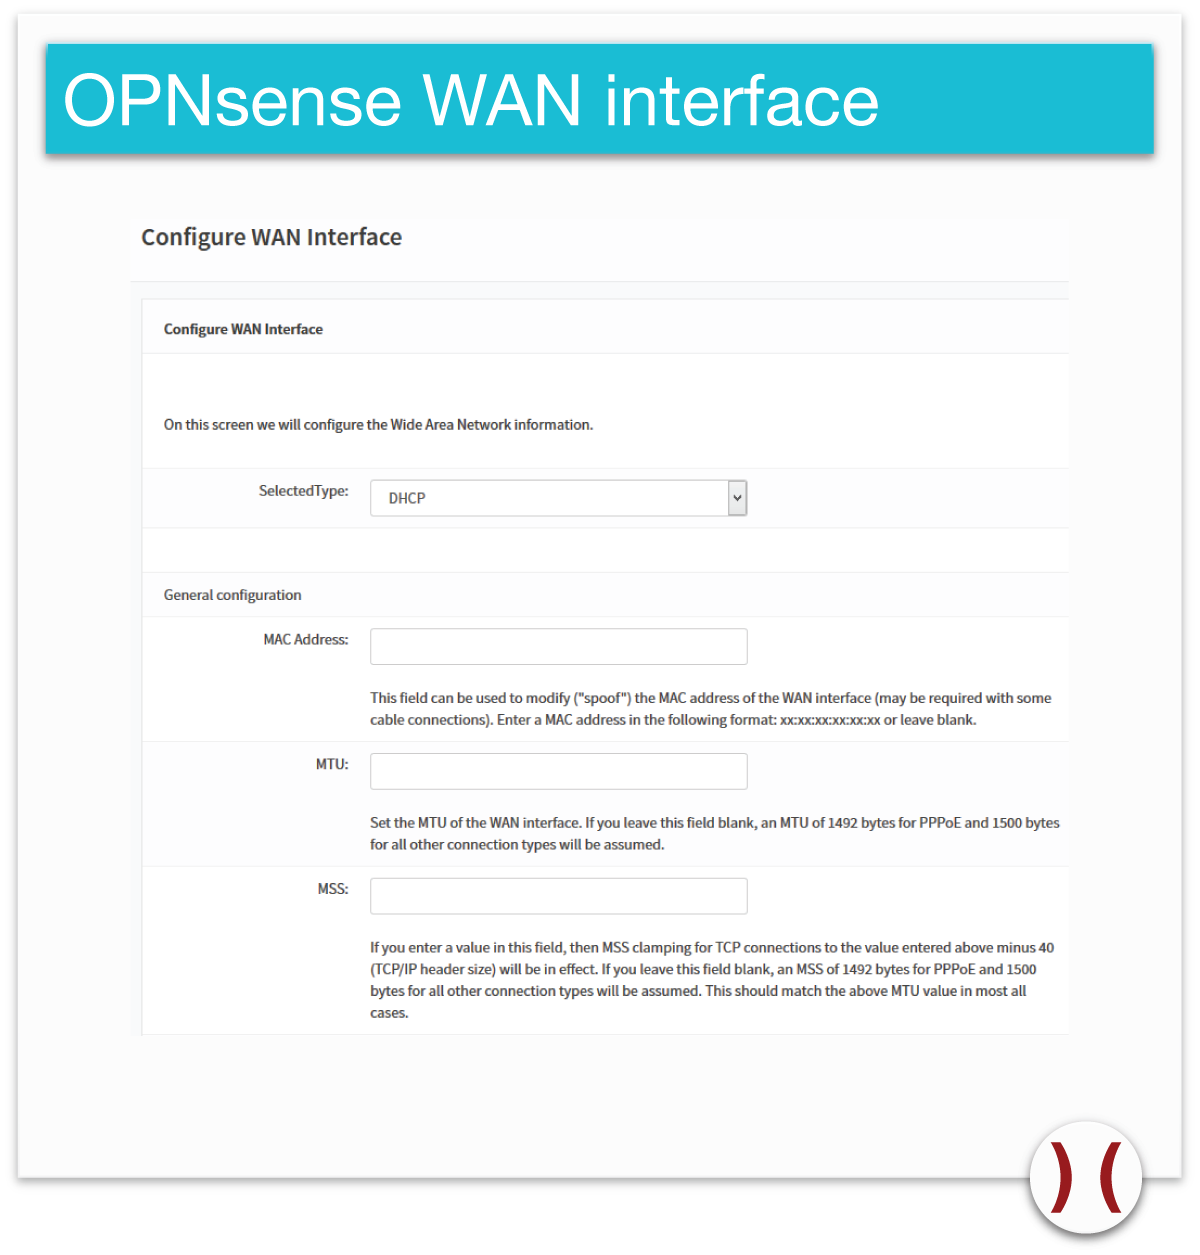
In our design we have to uncheck Block RFC1918 Private Networks otherwise the communication to our internet router/modem and WLAN AP is blocked.

Guess what? Change the password!

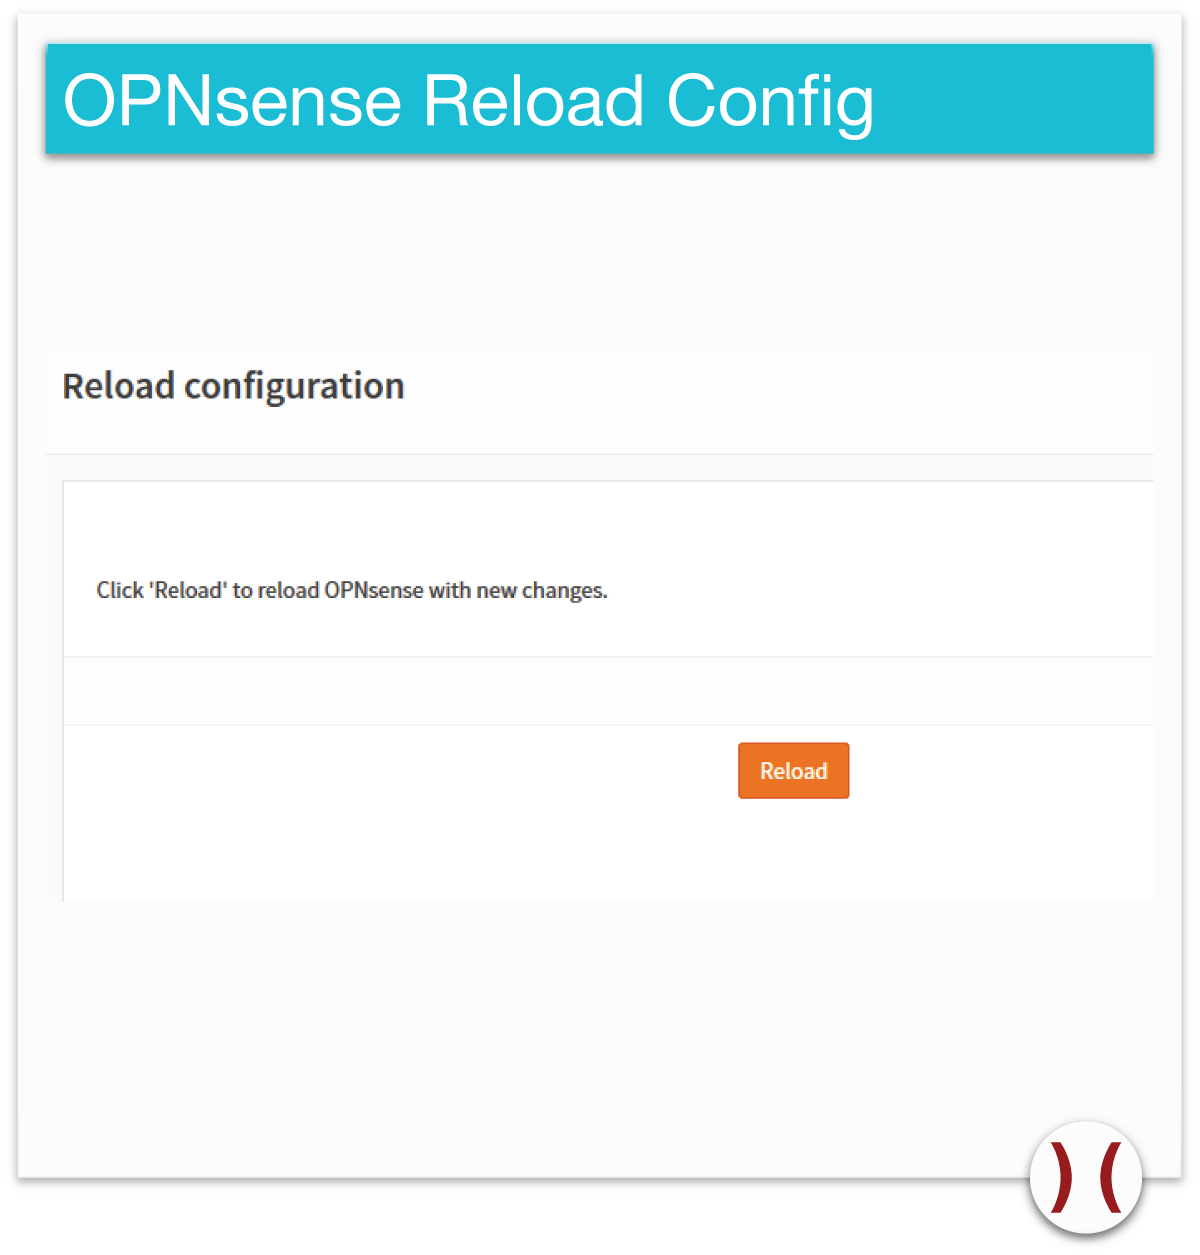
Reload the configuration to be active:
You may need to refresh your browser or re-login, let me direct your attention to the nice and clean look of the dashboard:
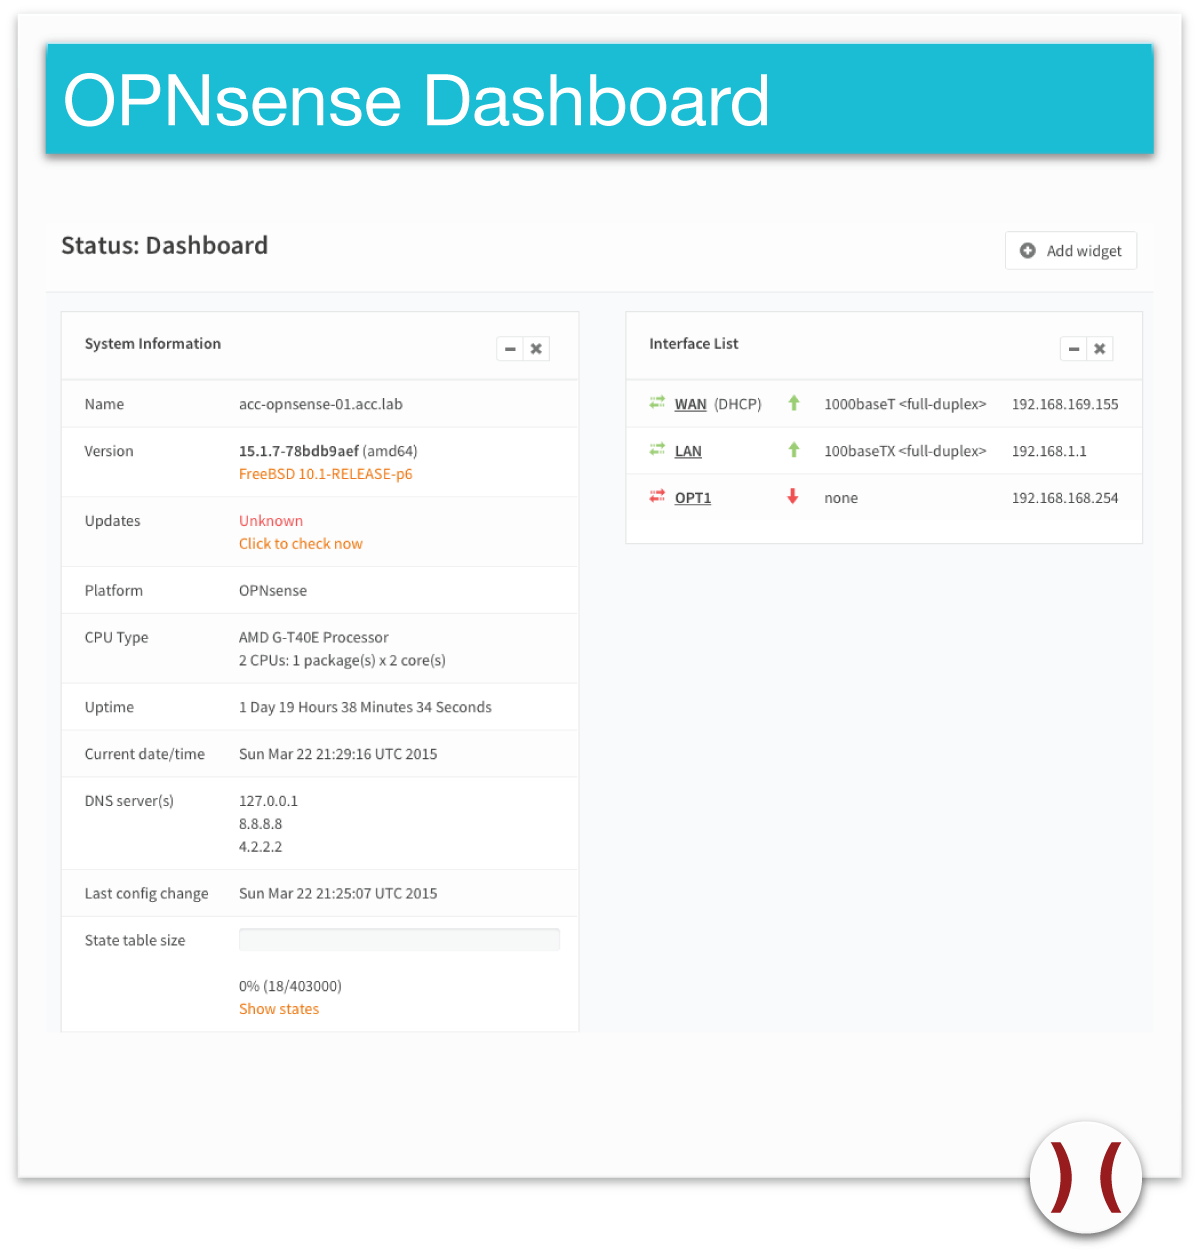
The dashboard is fully customizable with several widgets that show aspects of the firewall appliance. Just click on add widget and select the information you want to see at glance, like interface statistics, latest logs, disk status, services status and more.

I’m not going to explain how to configure all the various OPNsense features as this is very intuitive and well documented on the project’s wiki. There are very powerful features equal to enterprise class firewalls such as cluster support (CARP), complete DNS server (DNS Resolver), full IPv6 support (DHCPv6 Server/RA), Captive Portal (similar to the WLAN portal you see in hotels and public access spots), Load Balancer, VPN Server and more. Showing all configurations would require a dedicated article and is out of scope here.
To finish the project let’s do the minimum configuration for our design to work. Let’s configure internet access for home network (LAN) and for the WLAN Access Point network (OPT1). We need following:
Firewall, click on NAT and select Outbound tabAutomatic outbound NAT rule generation is selected (of course you can do all by yourself manually)Rules and select LAN tabOPT1 tab+ button to add a rule (and remember by default all is denied; so, no rule = no access)“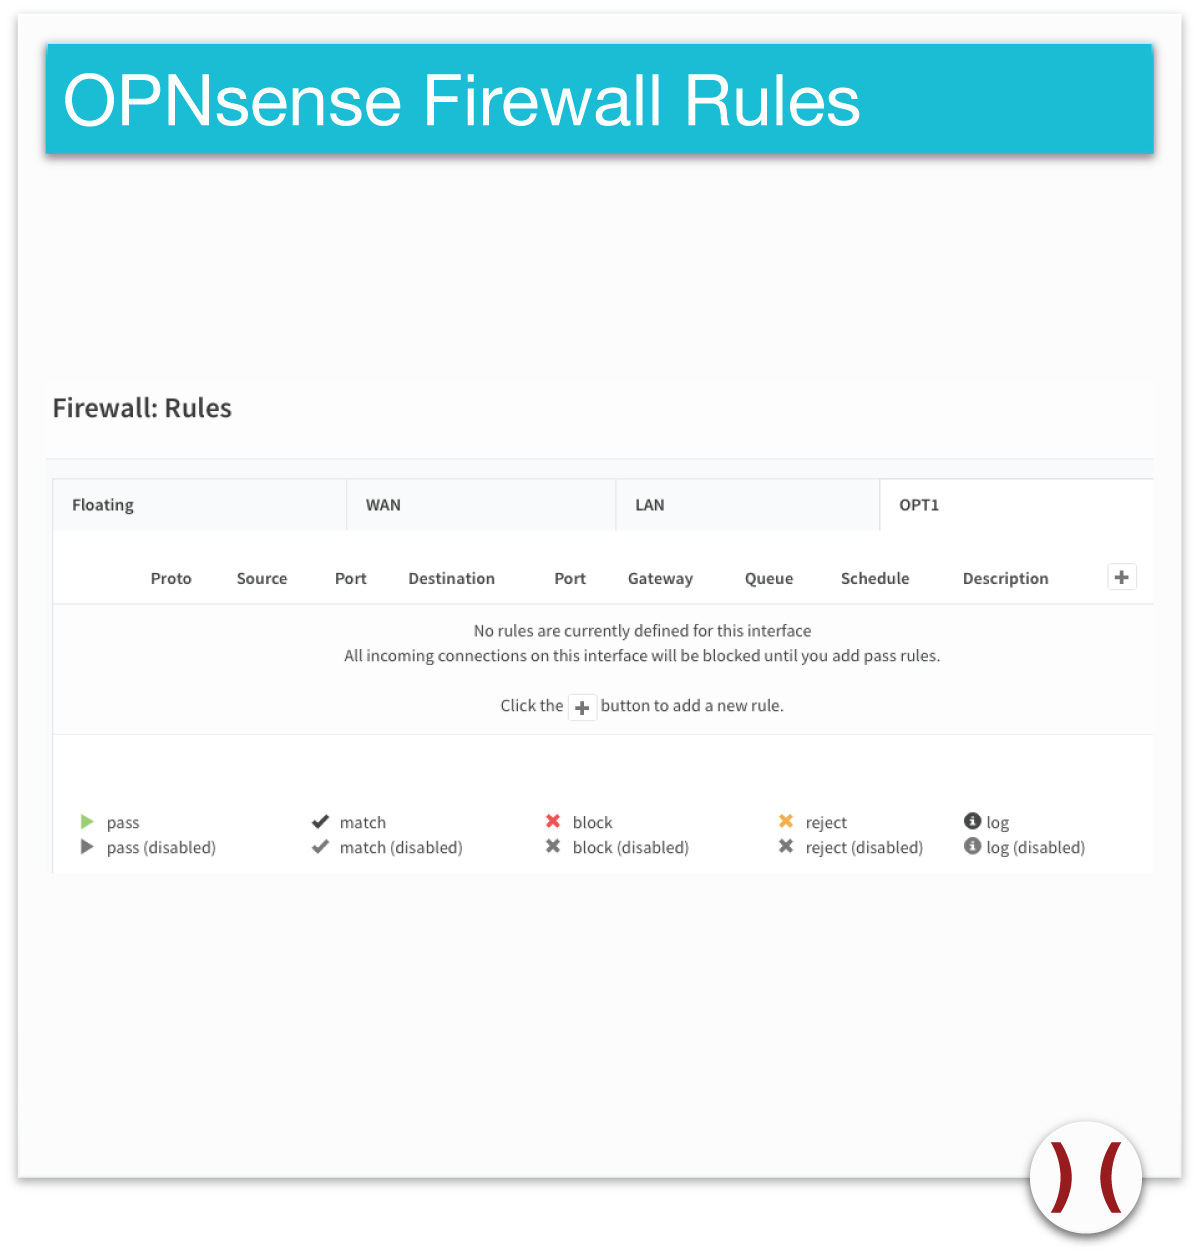
anyOPT1 net objectany
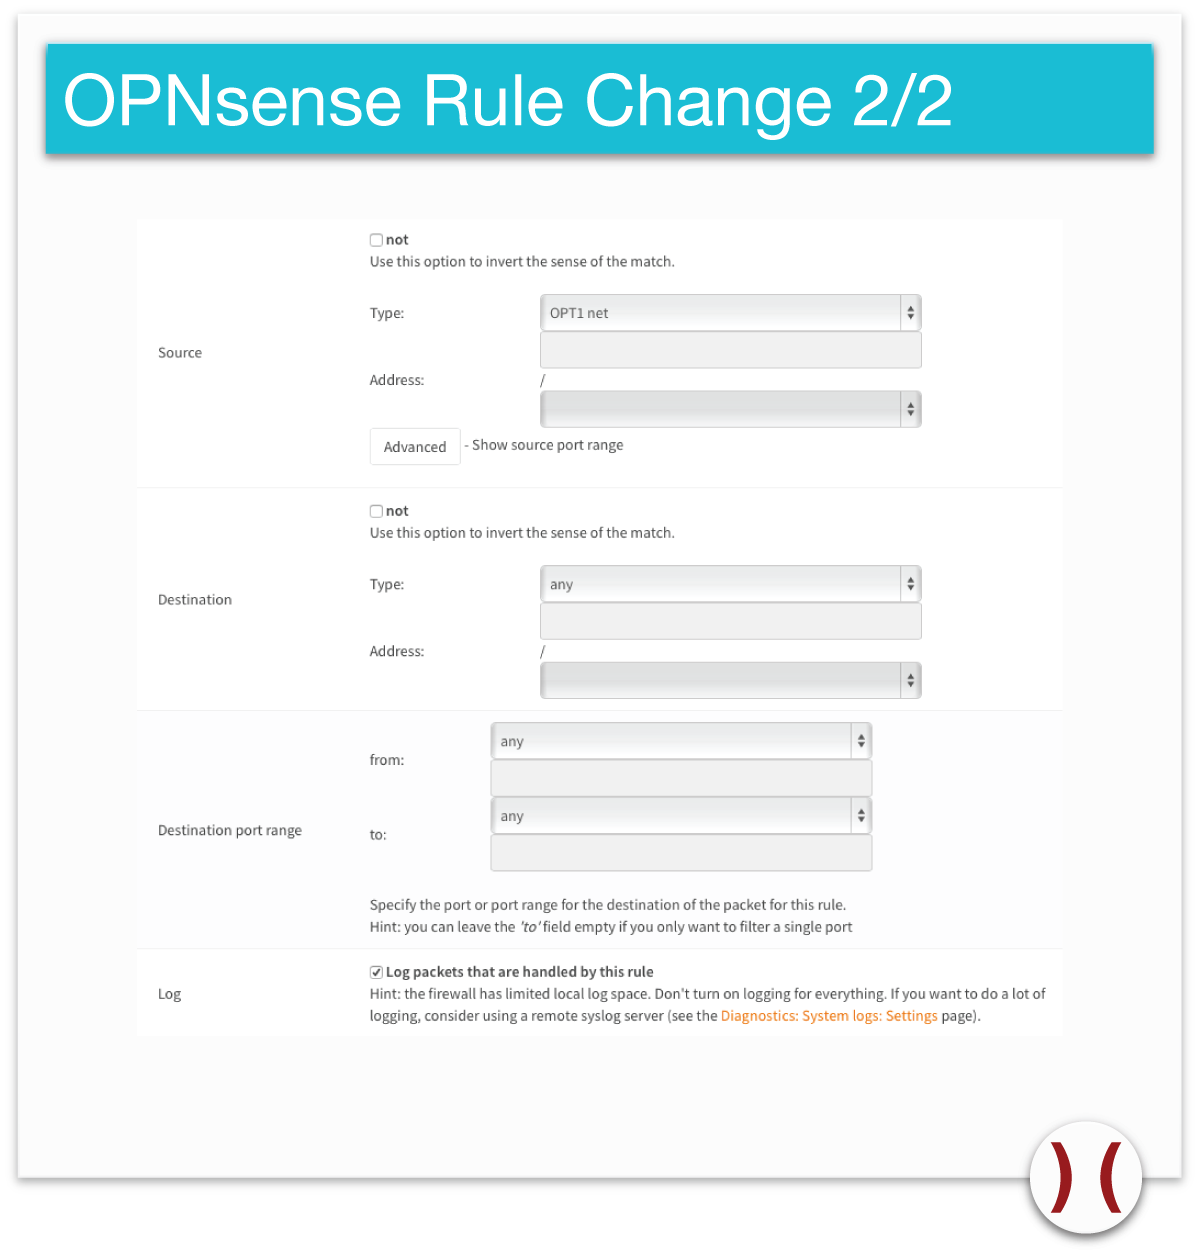
Save button and Apply changes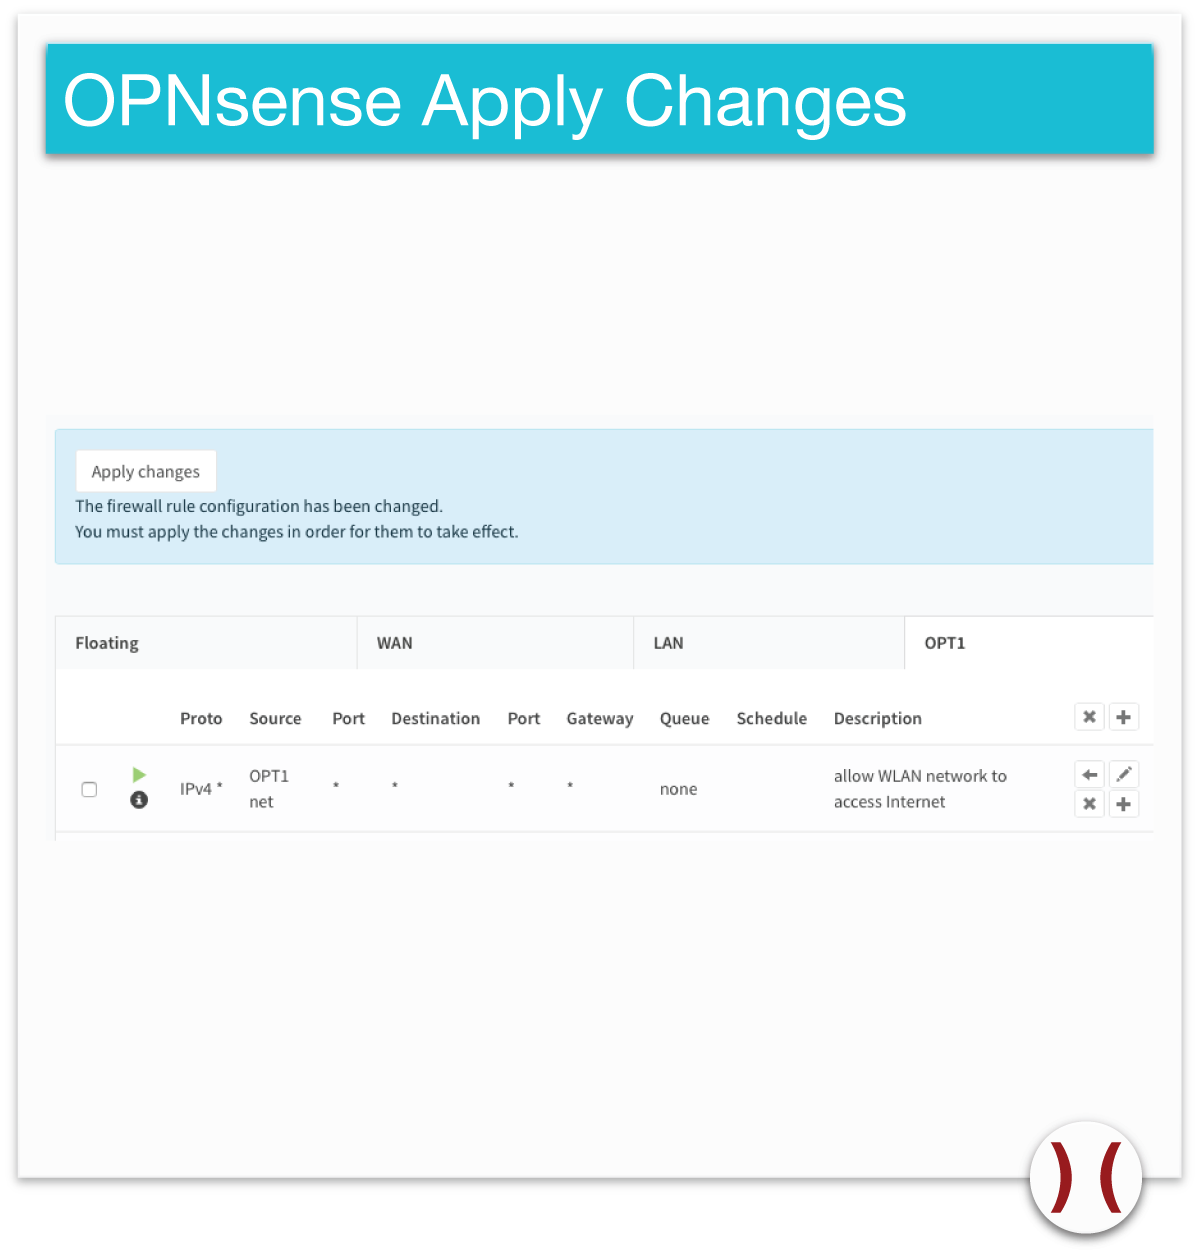
Finally, to close this project before going in production make sure to check your system for available updates: select system, firmware.

Select upgrade and you’ll see the progress window:
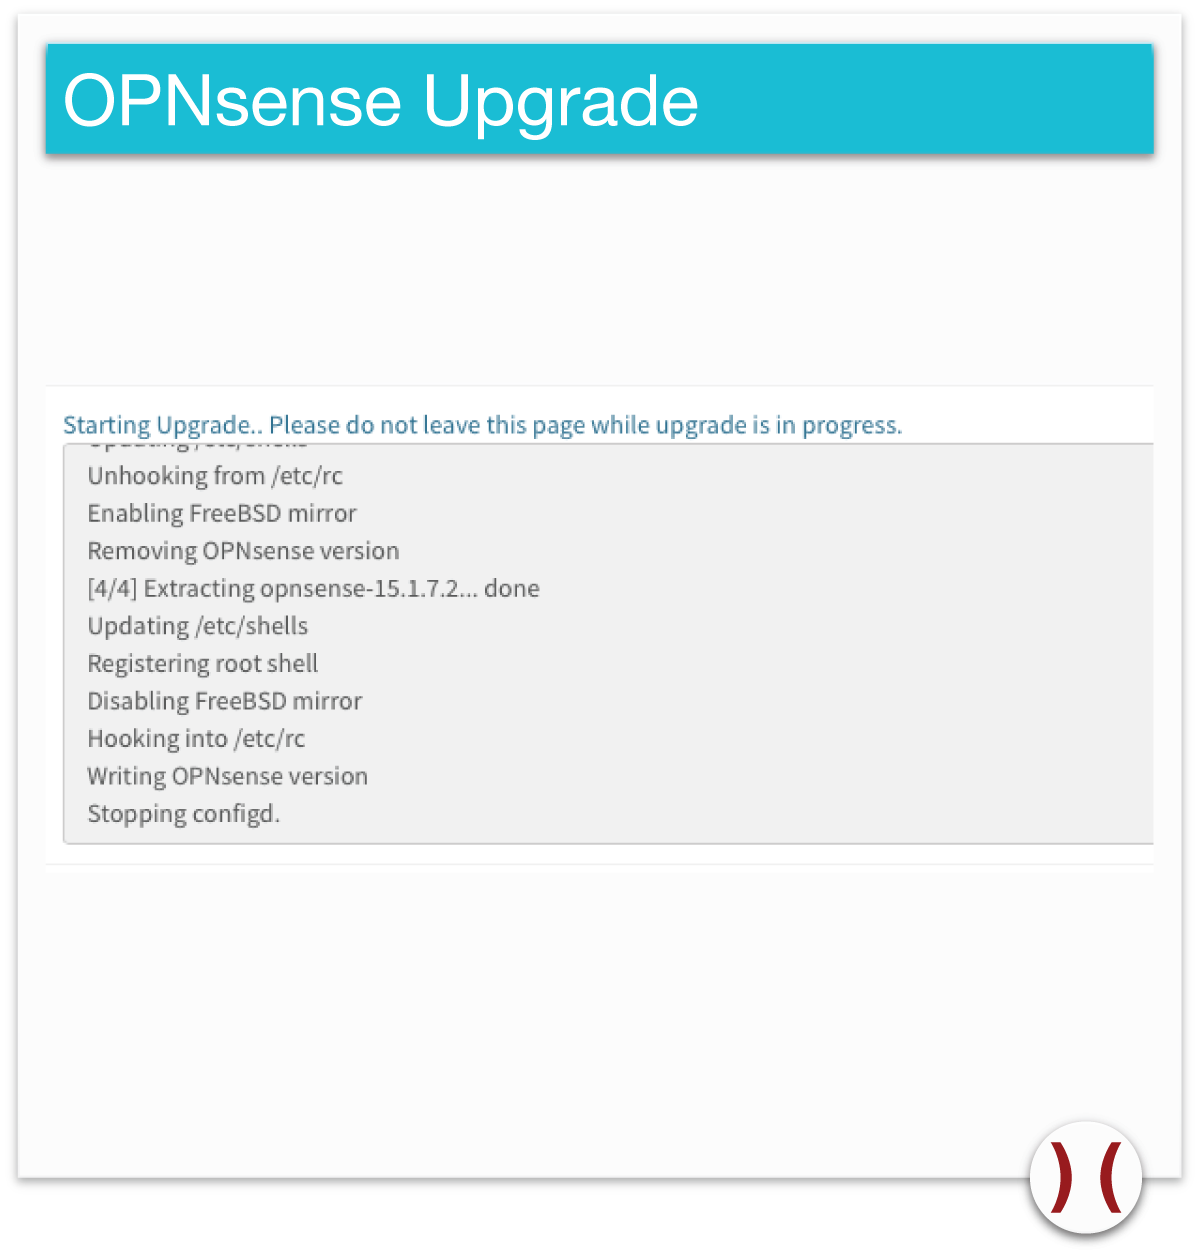
Reboot (if needed) and you’ll be all set.
This configuration is of course basic and you’ll need to finalize your firewall policy, but you can configure this firewall appliance to fit your needs. You can configure Dynamic DNS and use it as remote access with IPSEC or openVPN the features or you can enhance the appliance with a WLAN mPCI slot (and you have 2).
Just in case you like to play on Console, leave it attached to the provider router network; double NAT is not really fun if you play with your friends over the net, believe me: you’ll regret it otherwise.
Should you have concerns about your game data, then you better rethink. All your valuable data is already in the cloud (Microsoft, Sony, Nintendo and more) and we better don’t start this discussion here, do we? Games are fun, either take what you get or don’t, it’s that simple.
OPNsense is a fairly new project and will become more mature in the next few months, therefore some minor issues may need a fix. Still, I see no risk in day to day usage: the underlaying base is solid and started 12 years ago with m0n0wall.
Now, take it from here and make it better!
Our experts will get in contact with you!

Tomaso Vasella

Eric Maurer

Marius Elmiger

Eric Maurer
Our experts will get in contact with you!