Security Testing
Tomaso Vasella


In my last post I’ve presented a nice little hardware appliance from PCengines to be used as a home firewall.
I stated that the hardware is also capable fit for other usage scenarios.
Now I’d like to introduce you in a special Secure Remote Support scenario using the same hardware and some add-on modules in this article.
Let’s assume you have a device on customer site and need to have access to it for management and configuration purposes.
Sometimes the access via the customer Remote Access is not possible/feasible or does not fulfill all your requirements.
I’ll make a two-part article, in this part we’ll configure the appliance and the “out of band” IP access. In the second part we’ll discuss the VPN and the further security fine-tuning of the solution.
In this mini-project we’ll build and configure a remote access appliance secure to operate and not too expensive.
Let’s define the requirements:
This is a simple scenario but the project is capable of different and more complicated scenarios.
For now, let’s implement following network design:

The idea is to have the appliance attached to a dedicated remote support interface (maybe via cross-over cable) enabling the needed access the server via local console session.
At power-on the APU should execute following actions:
We choose the same APU hardware configuration as mentioned here:
| Component | Reference | Euro | USD |
|---|---|---|---|
| Board | PCEngines apu1d4 | 150.00 | 150.00 |
| Storage | PCEngines msata16d | 20.00 | 20.00 |
| Power supply | PCEngines ac12veur2 | 5.00 | 5.00 |
| Enclosure | PCEngines case1d2bluu | 10.00 | 10.00 |
For the mobile internet access we need a selection of following components:
| Component | Reference | Euro | USD |
|---|---|---|---|
| UMTS mPCIe card | Ericsson F5521gw | 36.00 | 39.00 |
| UMTS mPCIe card | HG Sierra UMTS 3G HSPDA PCI-E MC8775 | 27.00 | 30.00 |
| Internal Antenna | Internal GSM/UMTS/LTE/BT/WiFi Antenna | 7.00 | 7.00 |
| Mounted Antenna | Antenna SMA reverse | 2.00 | 3.00 |
| Antenna connector | Pigtail cable | 2.00 | 2.00 |
I’ve successfully tested this configuration with the Ericsson and Sierra cellular module with Sunrise and Swisscom SIM chip cards. It should work with other modules as long they are recognized by the Operating System (like Huawei, Novotel or ZTE) as also any other mobile provider that allows data packet transfer on their network.
This piece of hardware engineering is really a labour of love, it has so many features beautifully integrated in a small package, let’s highlight the following feature from the product description:
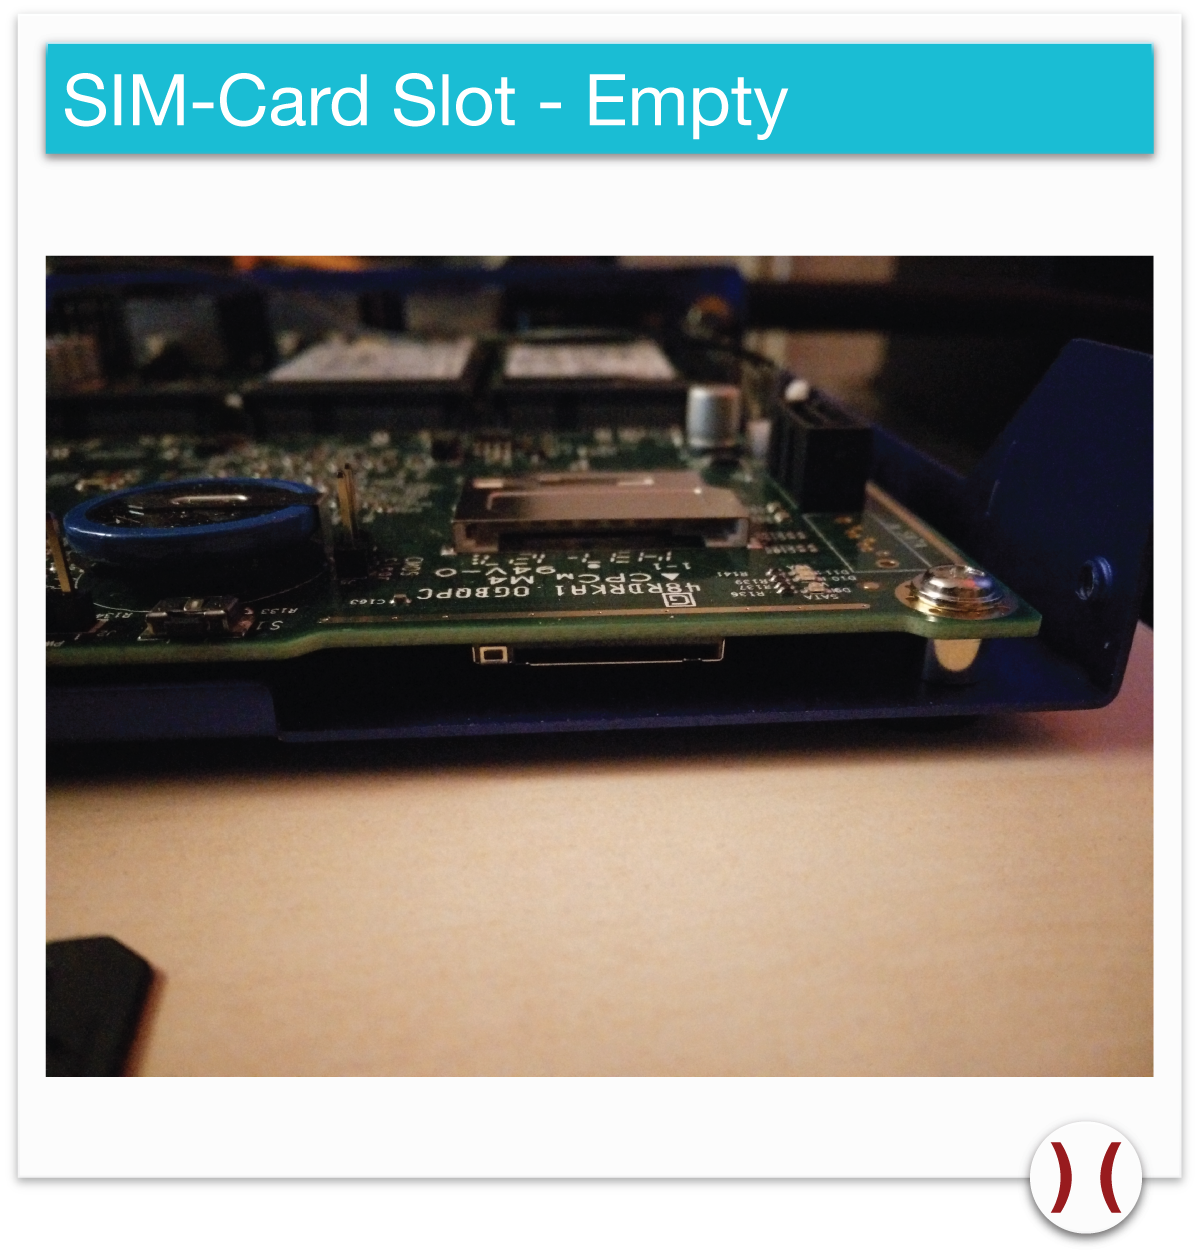
The second mini PCI express slot (the one in the middle) is connected with the SIM socket on the underside of the motherboard. You need to put your SIM chipcard into the slot and push until it clicks as shown in the picture below:

We can use any mobile subscription that has DATA connection enabled (EDGE/UMTS/LTE). I’m using a second SIM card attached to my mobile subscription for data sharing (it costs me 5.00 CHF a month on a sunrise plan) but you can use any other provider.
For this project we’ll use following software components:
| Component | Reference | Note |
|---|---|---|
| OS Debian Jessie (8) | APU version | An APU customized debian 8 release to be easily installed via serial port on the APU appliance made by Stanislav Sinyagin (nice job!) and make sure to read the README document |
| openVPN | Quick Start Guide | We’ll use this software to create a secure tunnel to access our support appliance. See also What is openVPN? |
| openSSH | Homepage | For the secure console access we’ll use this robust piece of software made by the openBSD Project |
The fact that we are using a plain x64 Debian distribution, gives us an almost unlimited software selection to choose from and ready satisfy our current and future needs.
Get ready for the installation procedure preparing the appliance as described here and make sure to insert the Cellular module in mPCIe slot 2 as shown in the picture below:

The following steps were done on Linux feel free to use your preferred environment:
Get the pcengines-apu-debian-cd 64bit version:
wget https://github.com/ssinyagin/pcengines-apu-debian-cd/releases/download/8.0-20150503/debian-8.0-amd64-CD-1.iso
There is no way to verify the ISO binary download but, since it’s hosted on Github, you could download the required configuration files and follow the README build procedure to create your own ISO image (32 or 64 bit) on your trusted environment.
dd if=debian-8.0-amd64-CD-1.iso of=/dev/sdb bs=16M
At this point we need console access to our APU appliance to begin the OS installation on it. For this purpose you may configure your serial terminal access as described here.
You should see the BIOS POST messages on your terminal console:
PC Engines APU BIOS build date: Apr  5 2014
Reading data from file [bootorder]
SeaBIOS (version ?-20140405_120742-frink)
SeaBIOS (version ?-20140405_120742-frink)
Found coreboot cbmem console @ df150400
Found mainboard PC Engines APU
Relocating init from 0x000e8e71 to 0xdf1065e0 (size 39259)
Found CBFS header at 0xfffffb90
found file "bootorder" in cbmem
CPU Mhz=1001
Found 27 PCI devices (max PCI bus is 05)
...
...
Build date: Apr  5 2014
System memory size: 4592 MB

Press F12 for boot menu.
If the installation medium is recognized, you should see the “Debian installer boot menu”:
                 ┌───────────────────────────────────────┐
                 │ Debian GNU/Linux installer boot menu  │
                 ├───────────────────────────────────────┤
           == >  │ Install                               │
                 │ Graphical install                     │
                 │ Advanced options                    > │
                 │ Help                                  │
                 │ Install with speech synthesis         │
                 │                                       │
                 │                                       │
                 │                                       │
                 │                                       │
                 │                                       │
                 └───────────────────────────────────────┘
The default Install will be selected in a few seconds leading to the automated installation will start. Don’t worry about the video mode error message… just hit SPACE.
Undefined video mode number: 314
Press <ENTER> to see video modes available, <SPACE> to continue, or wait 30 sec
Configure the hostname:
   ┌─────────────────────┤ [!] Configure the network ├─────────────────────┐
   │                                                                       │
   │ Please enter the hostname for this system.                            │
   │                                                                       │
   │ The hostname is a single word that identifies your system to the      │
   │ network. If you don't know what your hostname should be, consult your │
   │ network administrator. If you are setting up your own home network,   │
   │ you can make something up here.                                       │
   │                                                                       │
   │ Hostname:                                                             │
   │                                                                       │
   │ bluebrick____________________________________________________________ │
   │                                                                       │
   │     <Go Back>                                          <Continue>     │
   │                                                                       │
   └───────────────────────────────────────────────────────────────────────┘
And now let the installer do the job:
  ┌─────────────────────┤ Installing the base system ├──────────────────────┐
  │                                                                         │
  │                                   66%                                   │
  │                                                                         │
  │ Configuring man-db...                                                   │
  │                                                                         │
  └─────────────────────────────────────────────────────────────────────────┘


  ┌─────────────────────┤ Select and install software ├─────────────────────┐
  │                                                                         │
  │                                   13%                                   │
  │                                                                         │
  │ Running install-firmware...                                             │
  │                                                                         │
  └─────────────────────────────────────────────────────────────────────────┘
Once finished you’ll see following message:
  ┌─────────────────────┤ Finishing the installation ├──────────────────────┐
  │                                                                         │
  │                                   96%                                   │
  │                                                                         │
Sent SIGKILL to all processes...                                            │
Requesting system halt                                                      │
  └───────────────────[  825.181045] reboot: System halted──────────────────┘
The installer initiates a system halt (not a reboot) and therefore you have to:
If everything went well, you should see the GRUB boot menu:
                      GNU GRUB  version 2.02~beta2-22

 +----------------------------------------------------------------------------+
 |*Debian GNU/Linux                                                           |
 | Advanced options for Debian GNU/Linux                                      |
 |                                                                            |
 |                                                                            |
 |                                                                            |
 |                                                                            |
 |                                                                            |
 |                                                                            |
 |                                                                            |
 |                                                                            |
 |                                                                            |
 |                                                                            |
 +----------------------------------------------------------------------------+

      Use the ^ and v keys to select which entry is highlighted.
      Press enter to boot the selected OS, `e' to edit the commands
      before booting or `c' for a command-line.
After a few seconds the system will boot and you’ll be presented with the login screen:
Loading Linux 3.16.0-4-amd64 ...
Loading initial ramdisk ...
[    0.090336] ..MP-BIOS bug: 8254 timer not connected to IO-APIC
[    3.280512] i8042: No controller found
Loading, please wait...
fsck from util-linux 2.25.2
/dev/sda5: clean, 20698/971040 files, 247375/3878144 blocks
[    4.836593] systemd-fsck[260]: /dev/sda1: clean, 328/30976 files, 39576/123904 blocks

Debian GNU/Linux 8 bluebrick ttyS0

bluebrick login:
The default root password is “pcengines” and must be changed once you log in with
passwd
The appliance system installation is done.
Before going further we should update the system to the latest release and apply all patches available with following commands:
apt-get update && apt-get upgrade -y
Now we are ready for the GSM/UMTS/LTE Modem configuration:
We have to verify that the Linux kernel has recognized the mPICe mobile modem correctly.
To do so insert following command-script that will search through the system recognized devices and print the identified mobile modems:
for n in `ls /sys/class/*/*{ACM,wdm,usb0}*/device/interface`;do echo $(echo $n|awk -F '/' '{print $5}') : $(cat $n);doneIn my case I have the Ericsson 5521gw module installed and it will display following information:
ttyACM0 : F5521gw Mobile Broadband Modem
ttyACM1 : F5521gw Mobile Broadband Data Modem
ttyACM2 : F5521gw Mobile Broadband GPS Port
cdc-wdm0 : F5521gw Mobile Broadband Device Management
cdc-wdm1 : F5521gw Mobile Broadband USIM Port
We need to verify that the modem is working therefore we’ll interact with its management interface that is listening on the device /dev/ttyACM0.
To do so we install serial terminal tool:
apt-get install picocom
Careful! If you want to use picocom in a “nested” serial console session be aware that it could block the session, because it uses the same control command as minicom CTRL+A. You better connect via SSH (openSSH is installed and running by default) or use another serial terminal console like miniterm.
Now let’s connect to the modem serial port to issue some management command:
picocom -b 115200 /dev/ttyACM1

picocom v1.7

port is        : /dev/ttyACM1
flowcontrol    : none
baudrate is    : 115200
parity is      : none
databits are   : 8
escape is      : C-a
local echo is  : no
noinit is      : no
noreset is     : no
nolock is      : no
send_cmd is    : sz -vv
receive_cmd is : rz -vv
imap is        :
omap is        :
emap is        : crcrlf,delbs,

Terminal ready
Now we can interact with the modem configuration interface, it uses HAYES Command Set.
People like me who have been in this business for quite some years remember the days when we configured our analog modems to access the ISP providers and to do some hacking on the PSTN lines ;).
Anyway we can just hit at and enter to see if the modem reacts and it should respond with an OK on the standard output.
Let’s try it now: just type at and hit enter:
at
OK
Good, the modem is working and responded OK on our attention (AT) command. Now lets get some more information about it, we’ll use the ATI command (I stands for information):
ati3
F5521gw Mobile Broadband Module

OK

ati7
 Modem Configuration Profile

Product Type       Terminal Adapter
Interfaces         RS-232, USB
Options            PPP, RLP, V42bis

OK

ati9
(1.0ERI1900\\MODEM\\F5521gw5D)

OK
It looks like the modem is the one that we need for the next step of our configuration.
Below are the most important commands that we’ll need for our purposes:
| Command | Description |
| AT+CFUN | Sets the level of phone functionality (0:minimal, 1:full, 4:disable) |
| AT+CPIN=1234 | Enter PIN code |
| AT+CPWD=“SC”,“old”,“new” | Change PIN code from ‘old’ to ‘new’ |
| AT+CLCK=“SC”,0,“1234” | Remove PIN code |
| ATI | Status (Manufacturer, Model, Revision, IMEI, capabilities) |
| AT+COPS=? | List available networks 0-Unknown/2-Current/3-Forbidden, Longname, Shortname, Numerical-ID, “AcT” |
| AT+CSQ | Get signal strength. Answer: +CSQ: |
| ATD*99# | Dial access point |
| AT+CGDCONT=1,“IP”,“access.point.name” | Defines the provider context for accessing the data packet service |
Finally before going further let’s see if the adapter is getting signal and recognize the available providers, type the command at+cops=? and wait a few seconds:
at+cops=?
+COPS: (2,"Swisscom","Swisscom","22801",2),(2,"Swisscom","Swisscom","22801",0),(3,"Sunrise","Sunrise","22802",0),(3,"Sunrise","Sunrise","22802",2),(3,"orange CH","ORANGE","22803",0),(3,"orange CH","ORANGE","22803",2)

OK
As you can see, I’m having a Swisscom SIM card right now because it has the code 2 in the beginning the other two have a code 3 (check the table).
Last but not least let’s check the signal quality…
at+csq
+CSQ: 14,99

OK
The signal is pretty good let’s go further. Let’s get out from our picocom terminal session: hit CTRL+a and CTRL+x.
Now that the cellular module is working and has service access we need to make it capable to be used for internet access. For this we still missing an important part of the stack: PPP. Point to Point Protocol is the base of any IP access over modems so let’s install it:
root@bluebrick:~# apt-get install ppp

Reading package lists... Done
Building dependency tree
Reading state information... Done
The following extra packages will be installed:
  libpcap0.8
The following NEW packages will be installed:
  libpcap0.8 ppp
0 upgraded, 2 newly installed, 0 to remove and 0 not upgraded.
Need to get 471 kB of archives.
After this operation, 1,256 kB of additional disk space will be used.
Get:1 http://http.debian.net/debian/ jessie/main libpcap0.8 amd64 1.6.2-2 [133 kB]
Get:2 http://http.debian.net/debian/ jessie/main ppp amd64 2.4.6-3.1 [338 kB]
Fetched 471 kB in 1s (249 kB/s)
Selecting previously unselected package libpcap0.8:amd64.
(Reading database ... 18828 files and directories currently installed.)
Preparing to unpack .../libpcap0.8_1.6.2-2_amd64.deb ...
Unpacking libpcap0.8:amd64 (1.6.2-2) ...
Selecting previously unselected package ppp.
Preparing to unpack .../ppp_2.4.6-3.1_amd64.deb ...
Unpacking ppp (2.4.6-3.1) ...
Processing triggers for man-db (2.7.0.2-5) ...
Processing triggers for systemd (215-17) ...
Setting up libpcap0.8:amd64 (1.6.2-2) ...
Setting up ppp (2.4.6-3.1) ...
Processing triggers for libc-bin (2.19-18) ...
Processing triggers for systemd (215-17) ...
We need PPP because it gives us all tools needed to automatically configure the cellular modem and start the connection to our provider.
Now, remember the list of devices that the system recognize as modem? Beside the ttyACMx there were also cdc-wdmx; this device is resposible for an “ethernet emulation” of the cellular module. In fact if you execute following command:
ifconfig -a
you’ll see the “uncofigured” wwan0 device:
wwan0     Link encap:Ethernet  HWaddr 02:80:37:ec:02:00
          BROADCAST MULTICAST  MTU:1500  Metric:1
          RX packets:0 errors:0 dropped:0 overruns:0 frame:0
          TX packets:0 errors:0 dropped:0 overruns:0 carrier:0
          collisions:0 txqueuelen:1000
          RX bytes:0 (0.0 B)  TX bytes:0 (0.0 B)
We just need to make the right configuration, let’s start with the script that will initialize the modem and put the provider parameters needed to access the internet.
Let’s create a script file to initialize the interface:
vi /etc/chatscripts/swisscom.F5521gw
With the following content: bc.. ABORT BUSY ABORT ‘NO CARRIER’ ABORT ERROR TIMEOUT 10 ‘’ AT+CFUN=1 OK \dAT+CGDCONT=1,“IP”,“gprs.swisscom.ch” OK \d\d\dAT*ENAP=1,1 OK
This script tells that if the cellular module is working correctly, it will
At the same time we need to crate a script file to shutdown the interface
vi /etc/chatscripts/gsm_off.F5521gw
with this content:
ABORT ERROR
TIMEOUT 5
'' AT+CFUN=4 OK
This script just deactivates (AT+CFUN=4) the phone function of the cellular module; therefore the interface will get no more data from the modem.
Note: for other providers change the AT command sequence in the above script for the PDP Context Setting Command:
| Provider | APN | Script Command |
|---|---|---|
| Swisscom | gprs.swisscom.ch | \dAT+CGDCONT=1,“IP”,“gprs.swisscom.ch” OK |
| Sunrise | internet | \dAT+CGDCONT=1,“IP”,“internet” OK |
| Salt/Orange | internet | \dAT+CGDCONT=1,“IP”,“internet” OK |
For other providers, check this link select your carrier and replace gprs.swisscom.ch with the DATA APN value.
Finally we need to configure the network interfaces Debian Style:
vi /etc/network/interfaces
Add the following configuration at the bottom of the file:
# configuration of the GSM/UMTS/LTE modem card
allow-hotplug wwan0
iface wwan0 inet dhcp
    pre-up /usr/sbin/chat -v -f /etc/chatscripts/swisscom.F5521gw >/dev/ttyACM1 </dev/ttyACM1
    post-down /usr/sbin/chat -v -f /etc/chatscripts/gsm_off.F5521gw >/dev/ttyACM1 </dev/ttyACM1
Here we say that before the interface comes up it has to execute our script to the modem management interface to initialize the provider connection. Same story going down: after the interface has been brought down, we want to disable the phone module of the cellular card.
Now let’s verify the functionality:
root@bluebrick:~# ifup wwan0
Internet Systems Consortium DHCP Client 4.3.1
Copyright 2004-2014 Internet Systems Consortium.
All rights reserved.
For info, please visit https://www.isc.org/software/dhcp/

Listening on LPF/wwan0/02:80:37:ec:02:00
Sending on   LPF/wwan0/02:80:37:ec:02:00
Sending on   Socket/fallback
DHCPDISCOVER on wwan0 to 255.255.255.255 port 67 interval 7
DHCPDISCOVER on wwan0 to 255.255.255.255 port 67 interval 14
DHCPREQUEST on wwan0 to 255.255.255.255 port 67
DHCPOFFER from 10.204.93.241
DHCPACK from 10.204.93.241
bound to 10.204.93.246 -- renewal in 36636 seconds.
root@bluebrick:~#

root@bluebrick:~# ifconfig wwan0
wwan0     Link encap:Ethernet  HWaddr 02:80:37:ec:02:00
          inet addr:10.204.93.246  Bcast:10.204.93.247  Mask:255.255.255.248
          inet6 addr: fe80::80:37ff:feec:200/64 Scope:Link
          UP BROADCAST RUNNING MULTICAST  MTU:1500  Metric:1
          RX packets:4 errors:0 dropped:0 overruns:0 frame:0
          TX packets:10 errors:0 dropped:0 overruns:0 carrier:0
          collisions:0 txqueuelen:1000
          RX bytes:730 (730.0 B)  TX bytes:1332 (1.3 KiB)

root@bluebrick:~# route -n
Kernel IP routing table
Destination     Gateway         Genmask         Flags Metric Ref    Use Iface
0.0.0.0         172.20.36.1     0.0.0.0         UG    0      0        0 eth0
10.204.93.240   0.0.0.0         255.255.255.248 U     0      0        0 wwan0
172.20.36.0     0.0.0.0         255.255.255.0   U     0      0        0 eth0
root@bluebrick:~#
root@bluebrick:~#Now lets disable the interface manually with ifdown wwan0:
root@bluebrick:~# ifdown wwan0
Killed old client process
Internet Systems Consortium DHCP Client 4.3.1
Copyright 2004-2014 Internet Systems Consortium.
All rights reserved.
For info, please visit https://www.isc.org/software/dhcp/

Listening on LPF/wwan0/02:80:37:ec:02:00
Sending on   LPF/wwan0/02:80:37:ec:02:00
Sending on   Socket/fallback
DHCPRELEASE on wwan0 to 10.204.93.241 port 67
Everything is working fine! By now we still have eth0 providing us internet access, therefore we need a new configuration to test internet access via the cellular module.
Lets reconfigure eth0:
vi /etc/network/interfaces
Change the eth0 settings from:
iface eth0 inet dhcp
to:
iface eth0 inet static
	address 192.168.69.254
	netmask 255.255.255.0
To activate the changes issue following command:
ifdown eth0 && ifup eth0
The interface is now configured for the local server access (as defined in our network design) and the only way out is via mobile provider IP access. At this point we are ready to go to the next step into the VPN configuration.
We’ll continue the journey with the VPN configuration and the final appliance fine-tuning, in the next article.
Stay tuned!
Our experts will get in contact with you!

Tomaso Vasella

Eric Maurer

Marius Elmiger

Eric Maurer
Our experts will get in contact with you!