You want more?
Further articles available here


After the installation described on the first part of this article series let’s dive into the secure storage configuration of the InterLock software for USB Armory.
First of all we need to connect to the InterLock web interface.
| Step | Description | Picture |
|---|---|---|
| Authentication | Point your web browser to following URL address: https://10.0.0.1:4430 By default you’ll have a default volume named armory that can be decrypted with the password interlock. | 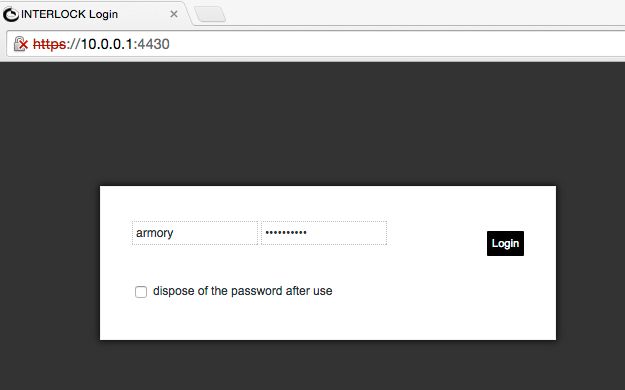 |
| First Login | Once decrypted you’ll get the Interlock web based GUI where all file operation takes place and apply all administrations tasks… | 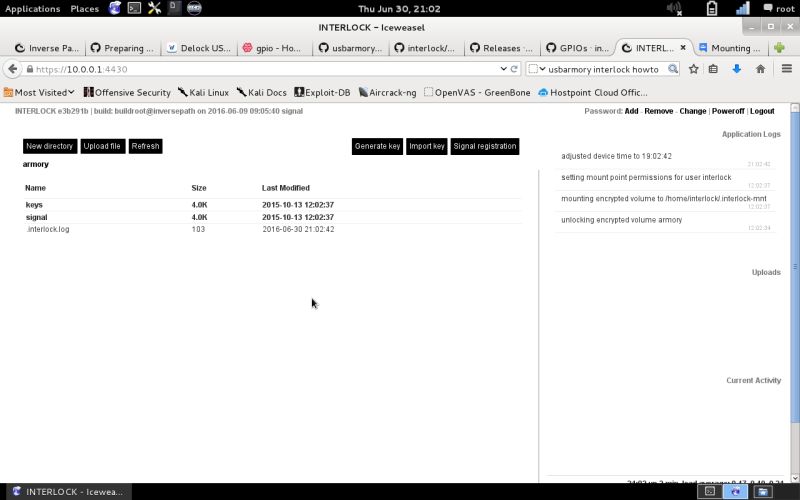 |
| Password Change | …and the first administration task to execute should be changing the volume encryption password by clicking change in the password section on the upper right section of the screen. | 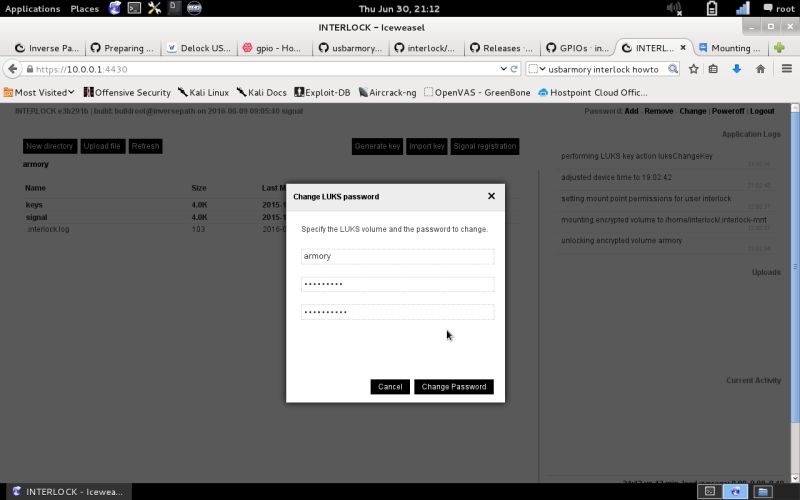 |
The GUI is divided in two parts: the left side is the file explorer/operations on the right one you’ll get the log and action protocols to verify the InterLock operations and messages.
On the login screen you may have noted the special flag that states dispose of the password after use ; this feature allows you to use a sort of one time password to access your encrypted volume on untrusted devices (internet café). To configure it you need to add one or more passwords to your encrypted volumes and keep track of the available password lists or just add one to burn it when necessary. Just follow the password change procedure selecting add instead of change and fill the web form inserting the volume name, a valid volume password and the new (disposal) password. You should get the following message on the application log window:
Performing LUKS key action luksAddKeylikewise once you’ll select a password for removal after usage, you’ll get the following message to confirm the password (key) removal:
Performing LUKS key action luksRemoveKeyNow let’s get a look of the file operations available from the GUI.
| Step | Description | Picture |
|---|---|---|
| File menu | Here are the allowed file operations on the volume. Beside the basic ones, note the further file encryption operations (encrypt, decrypt, sign & verify). | 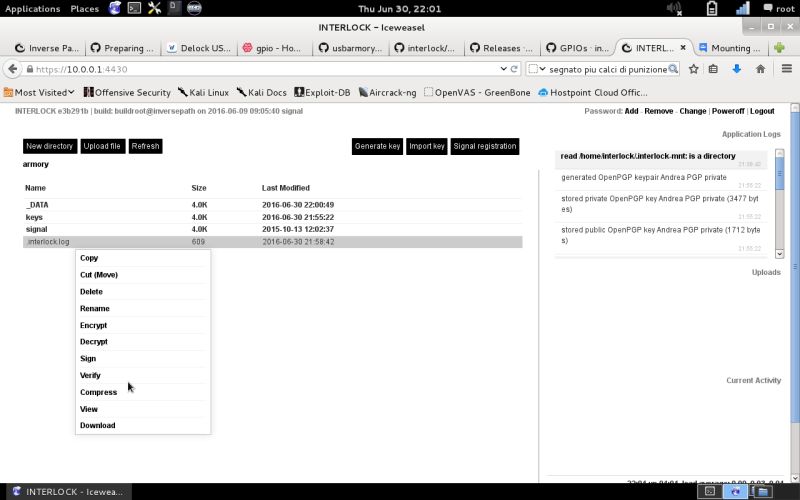 |
| New directory | Let’s create a new directory and put some files in it and encrypt them on file level. First, click on the upper right icon: New directory … | 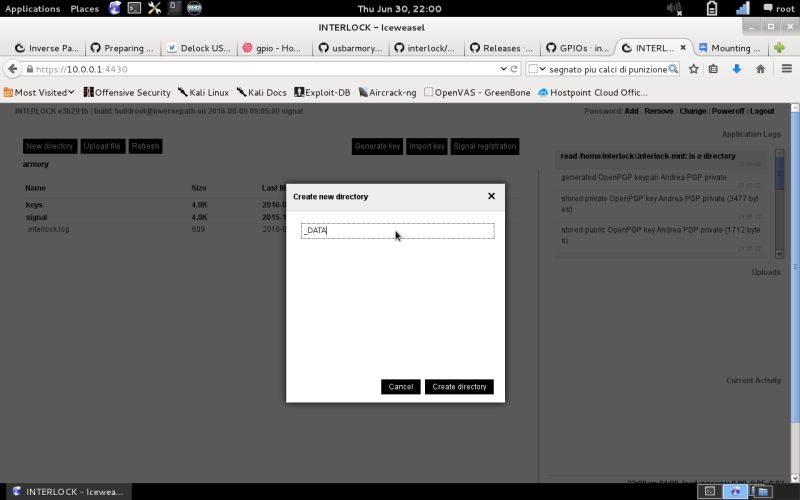 |
| File upload | …Now select your file (in our case a Keepass DB file) by clicking on the upper right Upload file icon. During the file upload you can check the status on the right screen inside the Uploads section. | 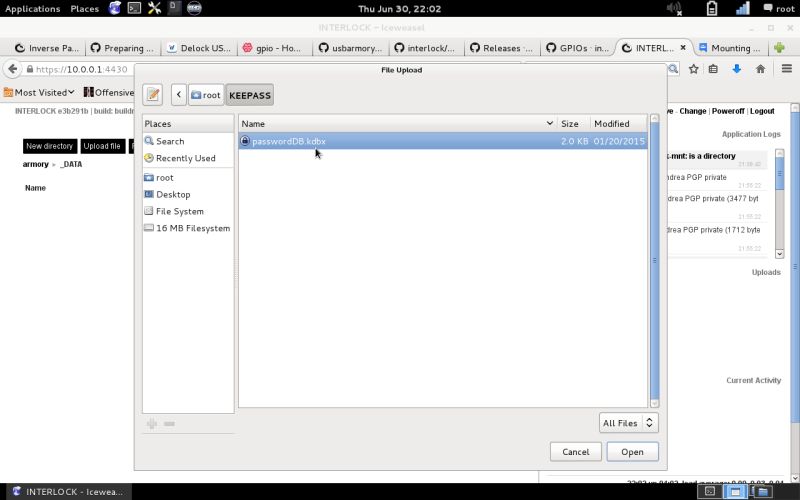 |
| File operation | Once done with the upload select the file and right click on it to view the file operations menu. Of course you can also Download the selected files to your device. | 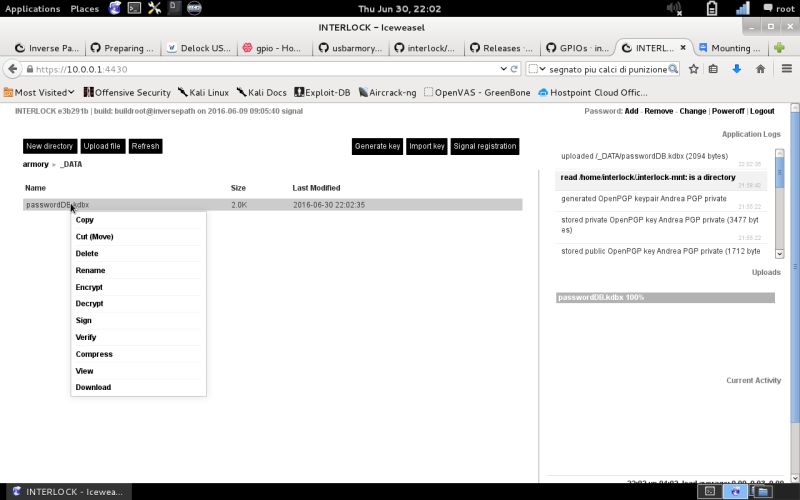 |
| File encryption | Select Encrypt from the file menu and choose the encryption algorithm (openPGP or AES-256-OFB). For openPGP you’ll need to have a PGP key (imported or generated on the Armory); for AES just enter the passphrase of choice. Note the option to wipe the original file on successful encryption to leave no trace at all. | 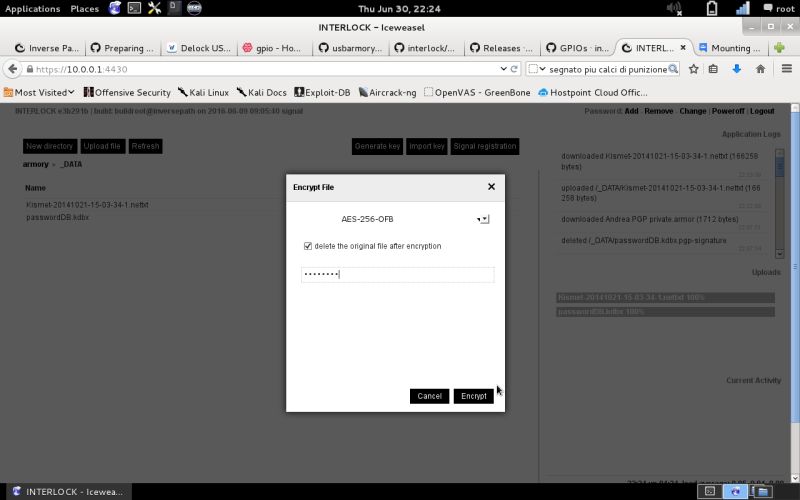 |
| File decryption | File decryption operation is done in the same way, just select Decrypt and insert the passphrase… | 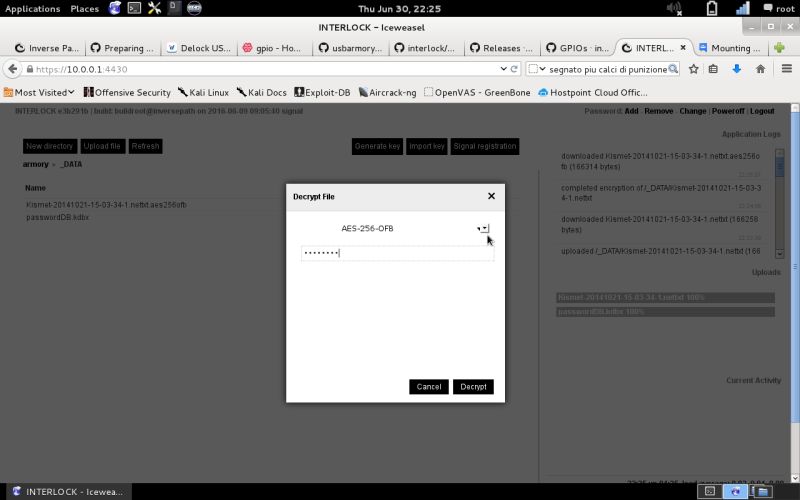 |
| Step | Description | Picture |
|---|---|---|
| New Encryption Key | To generate a new openPGP key on the Armory, select the Generate key button on the GUI. |  |
| Generate openPGP Key | Check the right section under Current Activity to see the generation process… | 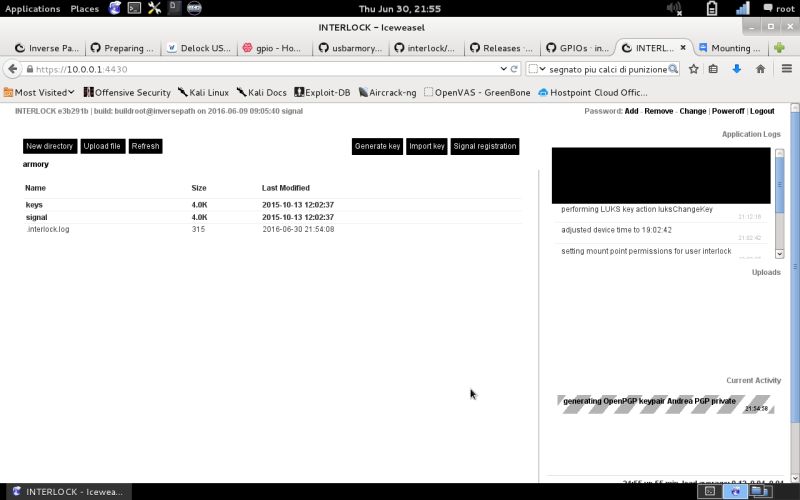 |
| openPGP Key Store | The new openPGP key is stored under VOLUME/keys/pgp/ with the public and private sections. | 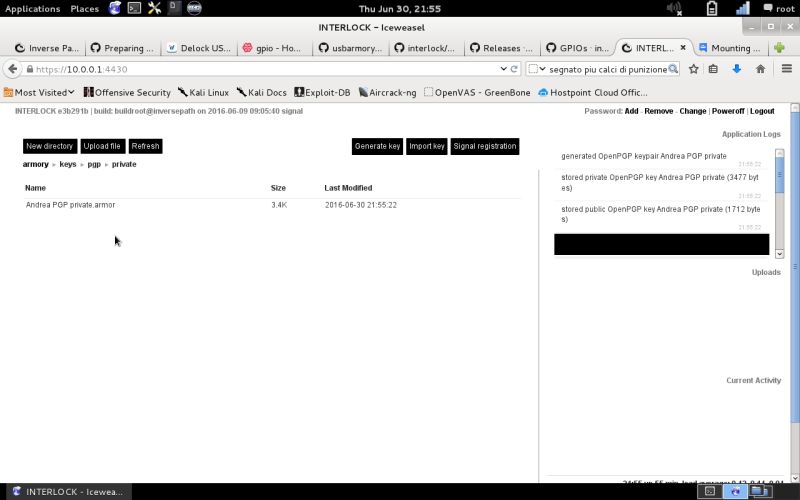 |
| openPGP Key Info | Show the key info by selecting Key Info on files operations menu. | 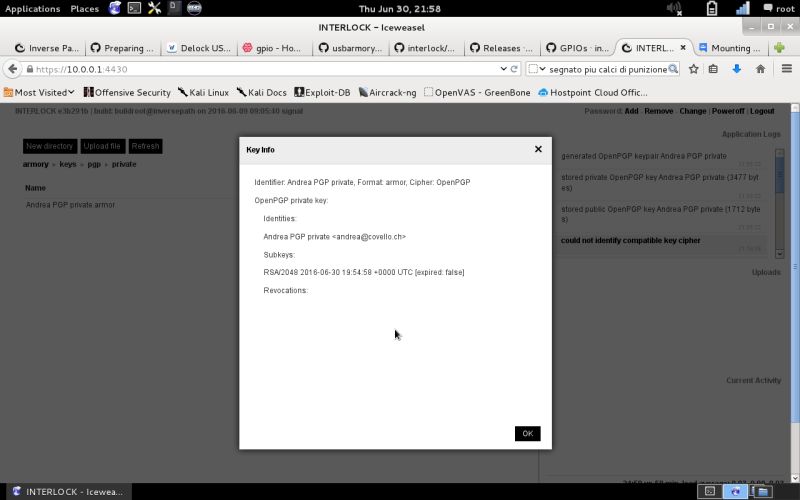 |
| openPGP Public Key | To see the public key select the generated key in the public directory and select view from the files operations menu… | 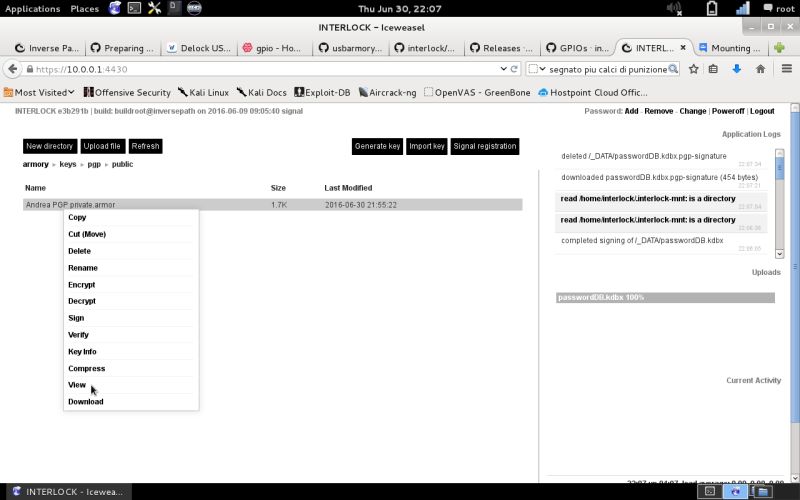 |
| openPGP Public Key | …Now you’ll see the key information on the screen. | 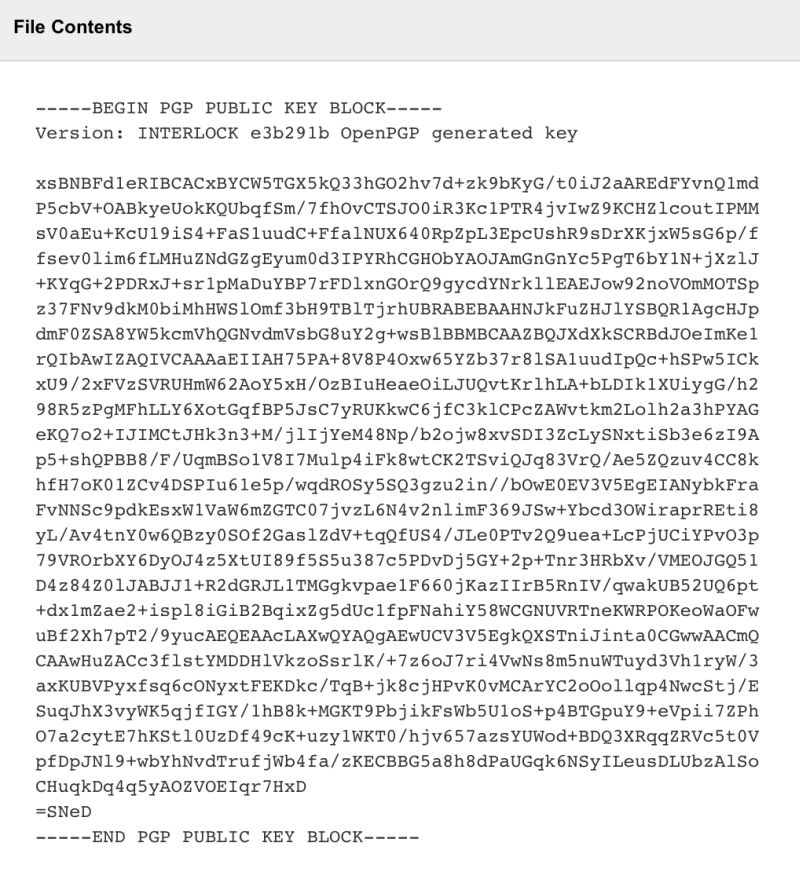 |
| File Signing | Using the openPGP certificate you may also use the file signing feature, just select Sign and select the openPGP key to sign with. |  |
| Step | Description | Picture |
|---|---|---|
| Setup for One Time Password (OTP) Token operations | One special feature you may use in InterLock, is the usage of a Software Token. To make it work you need to import a TOTP key certificate. Just select import Certificate and select TOTP instead of openPGP. After that you’ll be able to use the Armory as a OTP Token. | 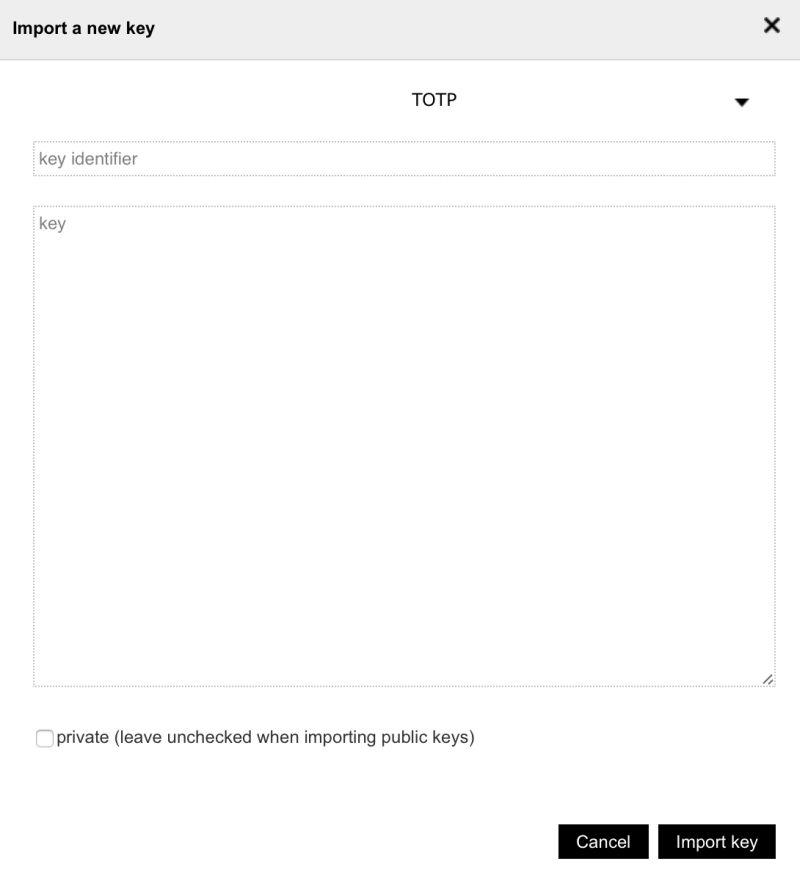 |
Let’s just make some standard security check, to assess the Armory system security settings. For this task I’ll use nmap for the network scan. Below are the results:
$ sudo nmap -p U:9,53,111,123,139,2049,T:1-65535 -A 10.0.0.1Starting Nmap 7.12 ( https://nmap.org ) at 2016-07-26 15:56 CEST Nmap scan report for 10.0.0.1 Host is up (0.00070s latency). Not shown: 65533 closed ports PORT STATE SERVICE VERSION 22/tcp open ssh Dropbear sshd 2016.73 (protocol 2.0) 4430/tcp open ssl/rsqlserver? | ssl-cert: Subject: commonName=10.0.0.1/organizationName=INTERLOCK | Not valid before: 2015-10-13T10:00:01 |_Not valid after: 2020-10-13T10:00:01 1 service unrecognized despite returning data.
MAC Address: E6:4B:CB:xx:yy:zz (Unknown) Device type: general purpose Running: Linux 3.X|4.X
OS CPE: cpe:/o:linux:linux_kernel:3 cpe:/o:linux:linux_kernel:4 OS details: Linux 3.2 – 4.4 Network Distance: 1 hop Service Info: OS: Linux; CPE: cpe:/o:linux:linux_kernel
TRACEROUTE HOP RTT ADDRESS 1 0.70 ms 10.0.0.1
OS and Service detection performed. Please report any incorrect results at https://nmap.org/submit/ Nmap done: 1 IP address (1 host up) scanned in 202.40 seconds
As you’ve seen, we can deploy secure storage on a stick with a high degree of trust in the used securing technology because all used modules are open-sourced and testable by the community. Still, the USB Armory can do more, it’s versatile and can be used for several security applications like:
I’d like to give my kudos to Andrea Barisani of Inverse Path for his passion in creating such an amazing project. This article wants to be a small contribution to the right cause in making the cyberspace a more secure place … you’re invited!
Our experts will get in contact with you!

Andrea Covello

Andrea Covello
Our experts will get in contact with you!