You want more?
Further articles available here

How to analyze group policies in Windows
Policy Analyzer is one of the tools that Microsoft offers in its Security Compliance Toolkit. In this article, I would like to talk about where Policy Analyzer can be used and how you can create your own Policy Rules file. You can use Policy Rules files to create your own security baselines and easily check whether a system complies with the specified security baselines.
Policy Analyzer is a tool that allows users to analyze and compare GPOs, which can be imported from different sources. It enables you to compare the GPOs applicable in the company with Microsoft’s security baselines, or to compare older backups of a GPO with the current one to show the differences. You can also compare different GPOs defined in the company with one another to detect discrepancies and duplicates.
On the other hand, a defined GPO baseline can be reconciled with local policies and registries effectively implemented in a system. The “Comparing a baseline with a client’s local settings” use case is analyzed next. As an example, a client is to be compared with the Windows 10 1909 baseline.
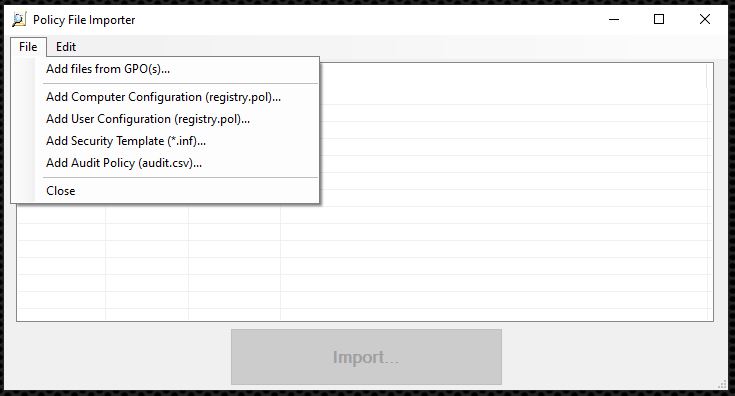
Once Policy Analyzer has been downloaded, it can be executed without requiring installation. To compare a GPO baseline with a local system, the GPOs have to be imported first of all. This is done by clicking Add. You can then choose the Add files from GPO
The security baseline used in this example is a Windows 10 version 1909 and Windows Server version 1909 security baseline. It can be downloaded from the same address as Policy Analyzer. Since this baseline contains both server and client settings, the server-specific settings must be removed in the Importer by selecting all undesired settings and then tapping the Delete button.
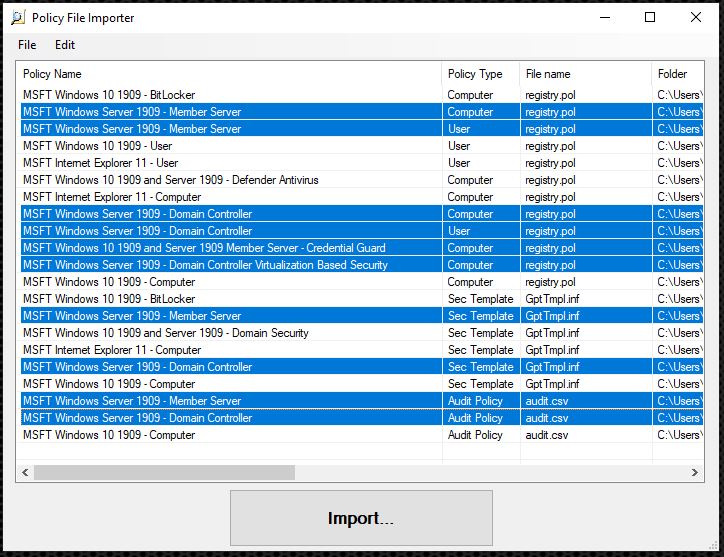
Once the unnecessary GPOs have been removed, the rest can be imported with Import…. This step creates a Policy Rules file that all the relevant GPO settings are stored in.
Subsequently, or for later use, the GPOs no longer have to be added manually, as the newly created Policy Rules file can be used instead. You should therefore choose a meaningful name for the Policy Rules file because it is also displayed on Policy Analyzer’s main screen.
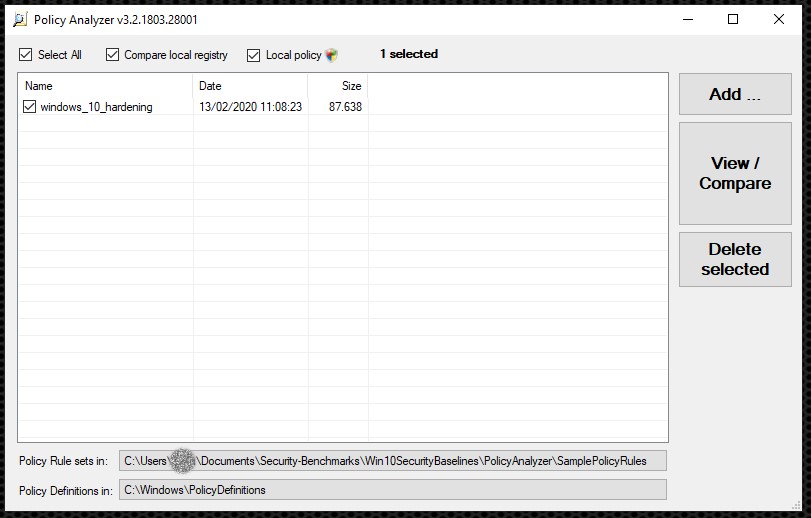
The setup of the Policy Rules file and how to create your own rules are discussed in detail later. To effectively compare the prepared GPOs with a client’s local settings, the baseline defined in this way and the Compare local registry and Local policy checkboxes above it can be selected. Click View / Compare to show the results in Policy Viewer. A new Policy Rules file that contains all settings for the local policy is created at the same time. However, the Policy Rules file generated during this process must be handled with care, because settings that can only be found in the registry are not stored in this file. It is not clear why this is the case, as it would be easy to do so.
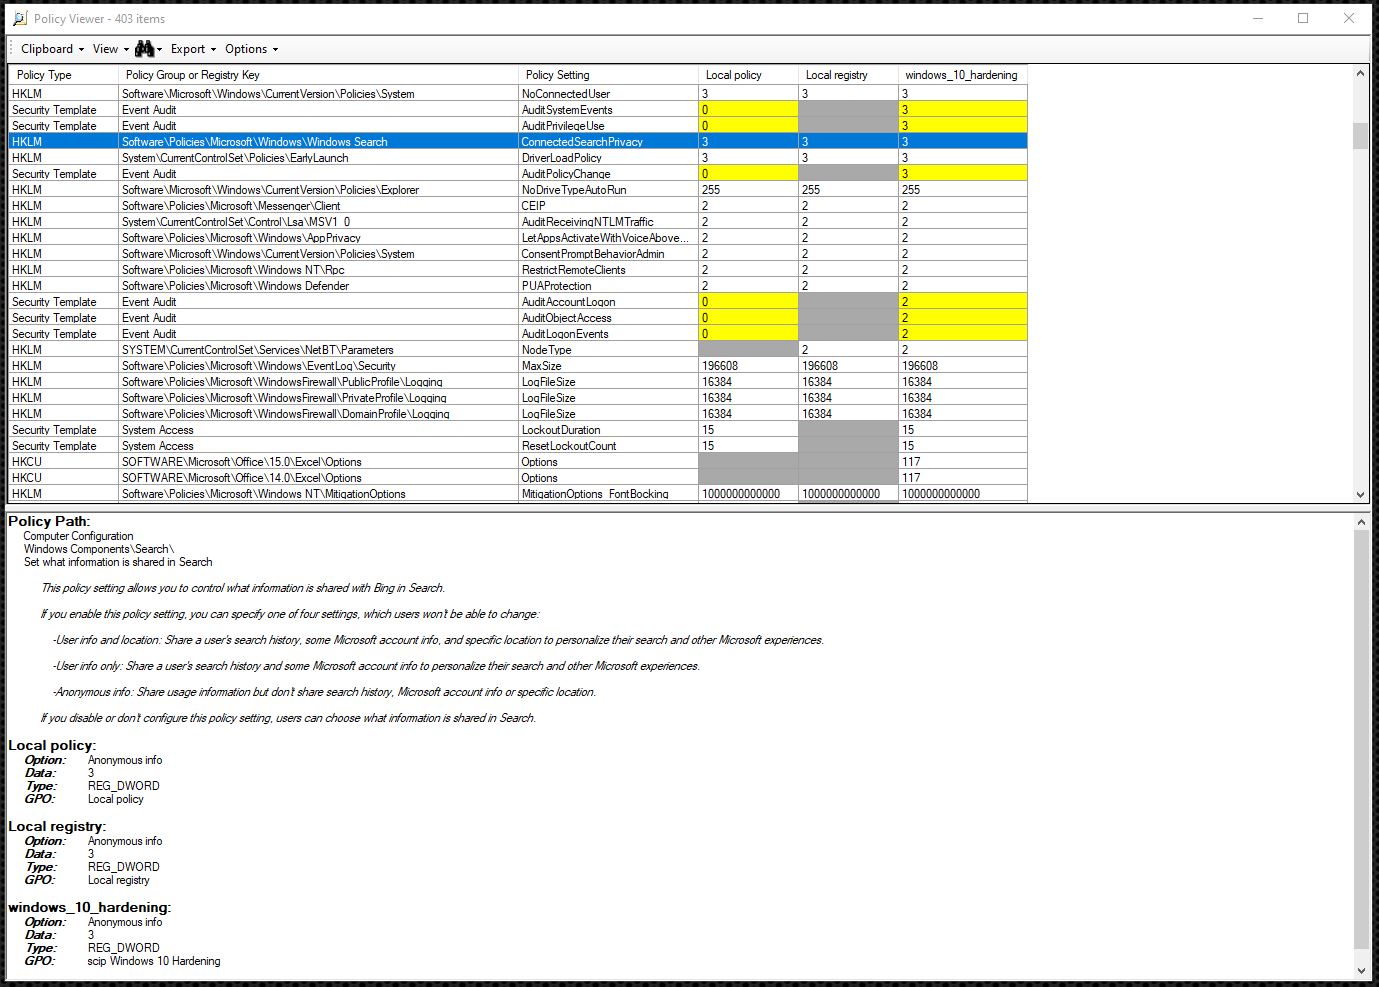
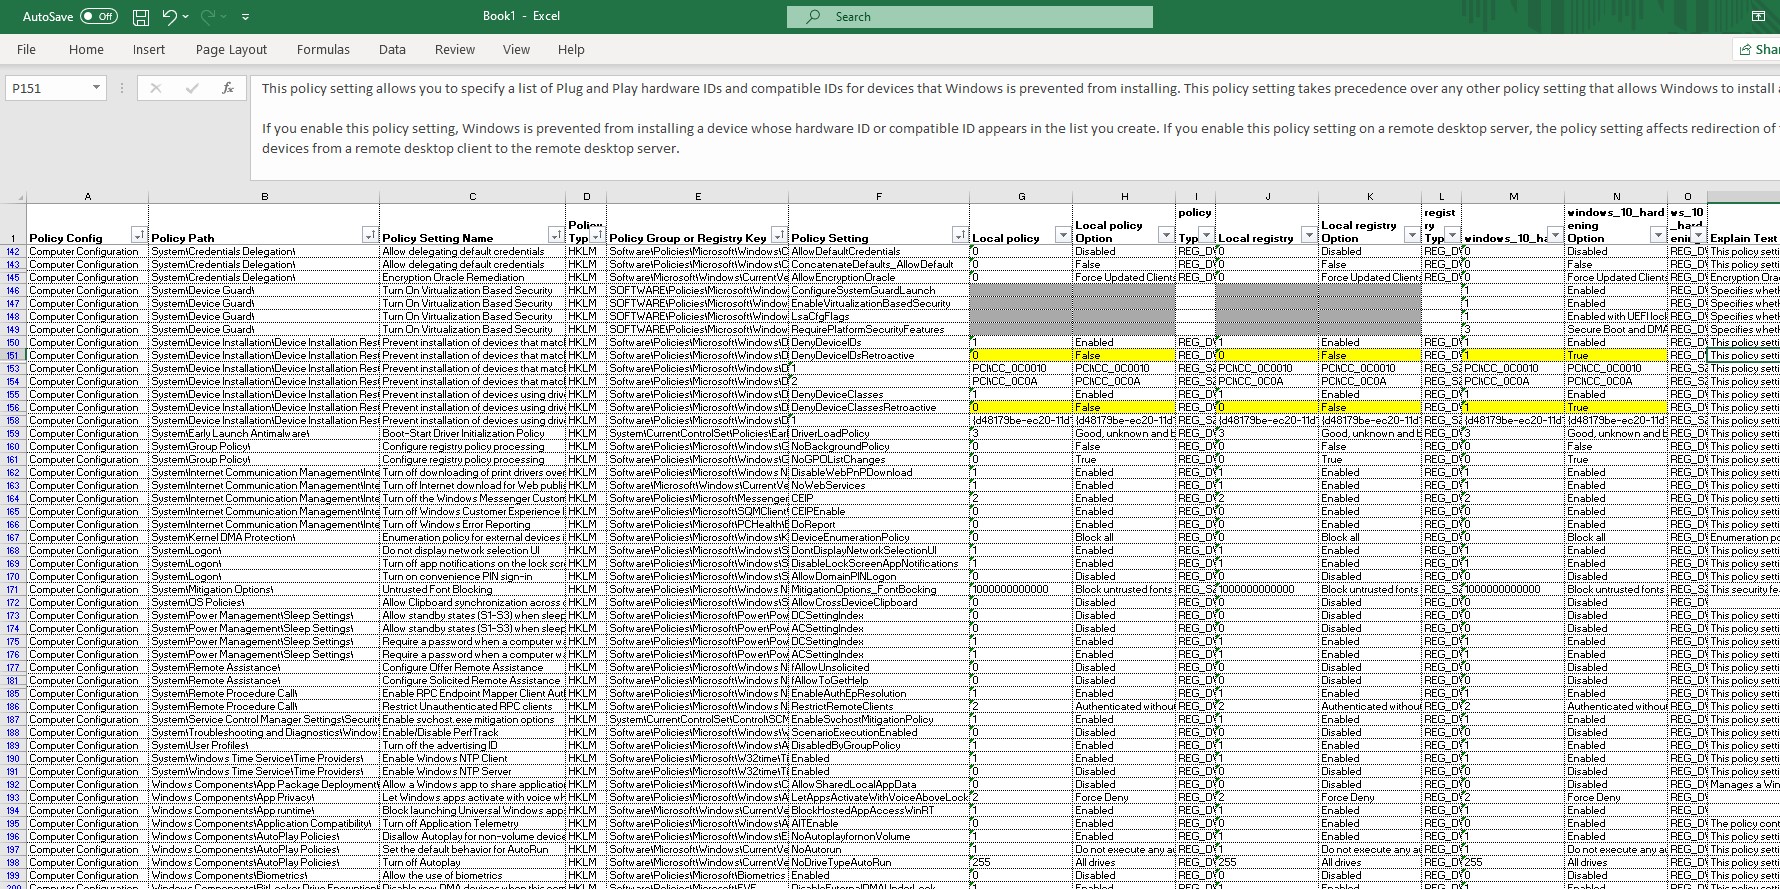
In Policy Viewer, one policy is displayed per row, whereby the value of the local policy is displayed followed by the value from the local registry and finally the value from the defined baseline, which is called windows_10_hardening in the example. If the values are identical, they are displayed in white. As soon as there are any differences, they are highlighted in yellow. Values that are not available are indicated by the color gray. This makes it easy to analyze the differences from a specified security baseline. If a specific setting is chosen, a more detailed explanation of the potential settings in question is displayed in the bottom part of the window (if available).
To make searching through and filtering everything easier and to save the entire hit list, the settings read can be exported in Excel format.
As already mentioned, Policy Analyzer works with Policy Rules files, which contain XML structured as follows.
<PolicyRules>

   <ComputerConfig>
      <Key></Key>
      <Value></Value>
      <RegType></RegType>
      <RegData></RegData>
      <SourceFile></SourceFile>
      <PolicyName></PolicyName>
   </ComputerConfig>

   <UserConfig>
      <Key></Key>
      <Value></Value>
      <RegType></RegType>
      <RegData></RegData>
      <SourceFile></SourceFile>
      <PolicyName></PolicyName>
   </UserConfig>

   <SecurityTemplate Section="">
      <LineItem></LineItem>
      <SourceFile></SourceFile>
      <PolicyName></PolicyName>
   </SecurityTemplate>

   <AuditSubcategory>
      <GUID></GUID>
      <Name></Name>
      <Setting></Setting>
      <SourceFile></SourceFile>
      <PolicyName></PolicyName>
   </AuditSubcategory>

</PolicyRules>
Here, settings that use a registry key are mapped under ComputerConfig and UserConfig. SecurityTemplate and AuditSubcategory can be used to map settings that are not stored in the registry. Once you know these XML elements, you can already create your own policy rules.
I did just that and created a Policy Rules file for the Windows 10 hardening checklist. So all it takes is one click to compare all the settings on the Windows 10 hardening checklist that are covered by the group policy or the registry settings.
Policy Analyzer is a good tool for comparing existing GPOs and comparing local settings with a defined baseline. Manually creating Policy Rules files is very time-consuming. An existing GPO should be used as a basis and extended to keep the effort to a minimum.
Our experts will get in contact with you!

Andrea Hauser

Andrea Hauser

Andrea Hauser

Andrea Hauser
Our experts will get in contact with you!